
The Singer 99K is a vintage sewing machine celebrated for its durability and reliable performance, offering a compact yet powerful alternative to larger models like the Singer 66.
Overview of the Singer 99K Model
The Singer 99K is a compact and reliable sewing machine, introduced in the 1950s, designed for versatility and durability. Available in both hand-crank and electric models, it offers a robust construction and ease of use, making it a popular choice among sewing enthusiasts. The machine features a user-friendly design, allowing for smooth operation and consistent stitch quality. Its compact size and portability add to its appeal, while the included manual provides essential guidance for operation and maintenance.
Importance of the Instruction Manual
The instruction manual is essential for understanding and optimizing the Singer 99K sewing machine. It provides detailed guidance on setup, operation, and maintenance, ensuring users can unlock the machine’s full potential. The manual covers threading, bobbin installation, and troubleshooting common issues like thread breakage or uneven stitching. By following the manual, users can prevent damage, extend the machine’s lifespan, and achieve professional-grade results. It also includes tips for enhancing sewing efficiency and overall performance, making it an indispensable resource for both beginners and experienced sewists.
Key Features of the Singer 99K
The Singer 99K features a robust, compact design, making it a versatile choice for various sewing tasks. It includes a range of stitch options and adjustable tension controls for precise sewing. The machine is known for its durability and smooth operation, suitable for both hand-crank and electric models. Additional features include compatibility with attachments like the overedge foot, enhancing its functionality for different fabrics and techniques. Its construction ensures long-lasting performance, making it a favorite among sewing enthusiasts and collectors alike.
Machine Setup and Preparation
Setting up the Singer 99K involves careful unpacking, inspection, and preparation to ensure optimal performance. Follow the manual’s guidance for a smooth and efficient setup process.
Unpacking and Initial Inspection
When unpacking the Singer 99K, carefully remove all components from the box and inspect for any signs of damage. Check the machine’s exterior, accessories, and attachments to ensure everything is intact. Locate the serial number near the on/off switch for future reference. Ensure all parts, such as the bobbin, needles, and feet, are included. Refer to the manual’s checklist to verify the completeness of your package before proceeding with setup.
Preparing the Machine for Use
Before use, ensure the Singer 99K is properly prepared. Follow the manual’s guidelines to oil the machine with Singer oil, as specified, to maintain smooth operation. Connect the power cord to a suitable electrical source and ensure the speed controller is set appropriately. Check that all attachments and accessories are securely installed. Familiarize yourself with the stitch length and tension levers, and ensure the machine is placed on a stable, flat surface. Proper preparation ensures efficient and trouble-free sewing experiences.
Understanding the Machine’s Components
Familiarizing yourself with the Singer 99K’s components is essential for optimal use. The machine features a durable construction, including a balance wheel for manual operation and a stitch length lever for adjusting seam length. The tension discs and take-up lever regulate thread tension, ensuring even stitching. The bobbin case and shuttle hook facilitate smooth thread flow, while the presser foot and feed dogs control fabric movement. Understanding these parts helps in maintaining and operating the machine effectively.
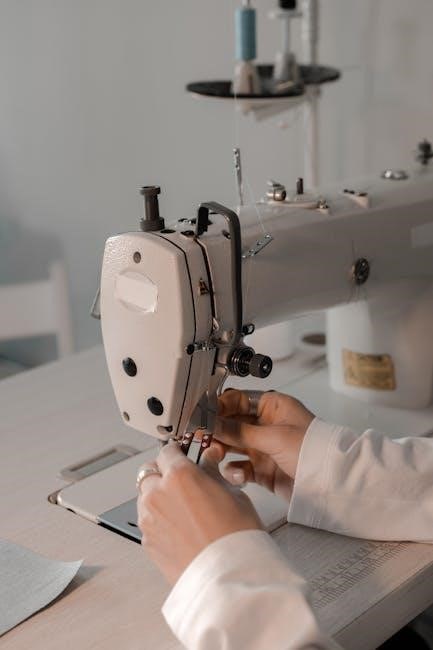
Threading and Bobbin Setup
Proper threading and bobbin setup are crucial for smooth operation. Wind the bobbin evenly, insert it correctly, and thread the machine as outlined in the manual. Use Singer oil to prevent clogging and ensure optimal stitch quality.
Step-by-Step Threading Guide
Begin by locating the spool pin and drawing the thread through the guide. Pass it through the tension discs, ensuring it’s seated properly. Next, insert the thread into the take-up lever and gently pull to set tension. Guide the thread through the needle bar and finally, thread the needle. Keep the machine oiled with Singer oil to maintain smooth operation and prevent thread breakage during sewing.
Installing the Bobbin
Lift the needle to its highest position and locate the bobbin case. Insert the bobbin into the case, ensuring the thread unwinds clockwise. Gently pull the thread to seat the bobbin correctly. Make sure the thread is properly aligned and not tangled. Close the bobbin case and test by sewing a few stitches to ensure smooth operation. Always use Singer oil to keep the machine well-lubricated for optimal performance.
Adjusting Tension for Optimal Stitch Quality
Proper tension ensures balanced stitches. Turn the machine off and lift the needle. Adjust the bobbin tension by turning the small screw on the bobbin case clockwise for tighter tension or counterclockwise for looser. For the upper thread, tweak the tension dial on the front of the machine. Test stitches on scrap fabric, ensuring evenness. If stitches are uneven or loops form, make fine adjustments until the tension is balanced. Proper tension prevents thread breakage and enhances sewing quality.
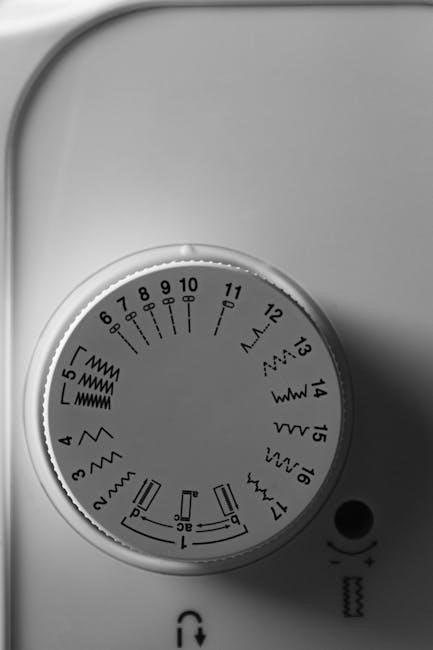
Stitch Selection and Operation
The Singer 99K offers versatile stitch options, including straight and zigzag. Use the stitch length and tension levers to customize settings for different fabrics and projects easily.
Types of Stitches Available
The Singer 99K sewing machine features an array of stitch options, including straight stitch, zigzag, and reverse stitching. These stitches cater to various sewing needs, from basic repairs to intricate designs. The machine’s simplicity allows for smooth operation, making it ideal for both beginners and experienced sewists. The availability of different stitch types ensures versatility, enabling users to tackle a wide range of projects with precision and ease.
Using the Stitch Length and Tension Lever
The Singer 99K’s stitch length and tension levers allow precise control over stitch quality. Adjusting the stitch length lever modifies the distance between stitches, while the tension lever ensures balanced thread flow. Proper tension prevents fabric puckering or loose stitching. Locate these levers near the machine’s front for easy access. Always test adjustments on scrap fabric to achieve optimal results before sewing your final project.
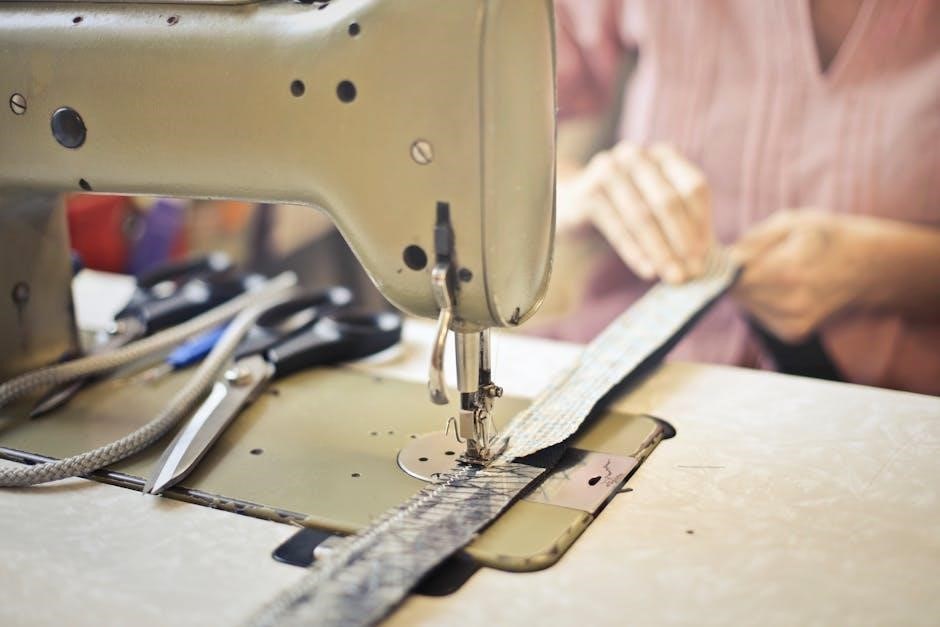
Basic Sewing Operations
Mastering basic sewing operations on the Singer 99K begins with threading the machine and setting the desired stitch. Place fabric under the presser foot, align edges, and gently guide material as it moves. Use the handwheel for manual control or engage the motor for continuous sewing. Keep fabric taut but not stretched to ensure even stitching. Practice on scrap material to build confidence and achieve consistent results before working on actual projects.
Maintenance and Care
Regular maintenance ensures the Singer 99K performs optimally. Oil moving parts, clean dust, and inspect for wear. Use Singer oil to prevent damage and extend lifespan.
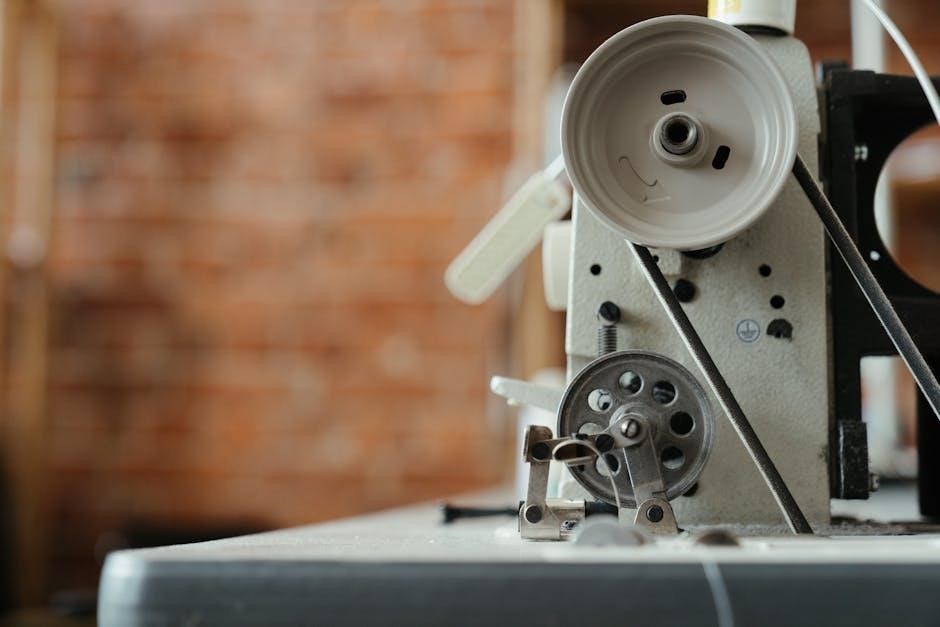
Oiling the Machine
Oiling is essential for maintaining the Singer 99K’s smooth operation. Use only Singer oil to lubricate moving parts, as inferior oils can clog bearings and cause wear. After applying oil, run the machine at high speed for a few minutes to ensure the oil reaches all mechanisms. Regular lubrication prevents friction, extends the machine’s lifespan, and ensures optimal performance. Neglecting oiling can lead to mechanical issues and reduce sewing efficiency.
Cleaning the Machine
Regular cleaning is crucial to maintain the Singer 99K’s performance. Remove lint and debris from the bobbin area, tension discs, and stitch plate using a small brush. Avoid harsh chemicals or liquids, as they may damage the machine’s finish or harm electrical components. Gently wipe the exterior with a dry cloth to prevent rust. Cleaning ensures smooth operation, prevents thread breakage, and keeps the machine in excellent condition. Schedule cleaning after each project for optimal results.
Regular Maintenance Schedule
Regular maintenance ensures the Singer 99K operates efficiently. Oil the machine every 10 hours of use to lubricate moving parts. Clean the bobbin area, tension discs, and stitch plate frequently to remove lint. Check and replace needles and belts as needed. Schedule annual deep cleaning and professional servicing for optimal performance. Follow the maintenance routine in the manual to extend the machine’s lifespan and maintain stitch quality. Consistent care ensures reliable operation and prevents mechanical issues.
Troubleshooting Common Issues
Identify and resolve issues like thread breakage, uneven stitching, or machine noise by checking tension, cleaning lint, and ensuring proper oiling. Refer to the manual for solutions.
For detailed fixes, download the Singer 99K manual.
Identifying and Resolving Thread Breakage
Thread breakage on the Singer 99K can occur due to improper tension, low-quality thread, or incorrect threading. Check the manual for guidance on adjusting tension and rethreading properly.
Ensure the thread is compatible with the machine and fabric. Regularly clean lint from the tension discs and bobbin area to prevent friction.
If issues persist, consult the Singer 99K instruction manual for detailed troubleshooting steps.
Fixing Uneven Stitching
Uneven stitching on the Singer 99K can result from incorrect tension, improper threading, or a dull needle. Begin by checking and adjusting the upper and bobbin thread tensions according to the manual.
Rethread the machine, ensuring the thread follows the correct path. Replace the needle if it appears blunt or damaged.
For persistent issues, refer to the Singer 99K instruction manual for detailed troubleshooting guidance.
Addressing Machine Noise
Machine noise in the Singer 99K can often be resolved by ensuring proper lubrication and maintenance. Regularly oil the machine using Singer oil, as specified in the manual, to keep moving parts smooth and quiet.
Clean the machine thoroughly to remove lint and debris that may cause friction and noise.
If noise persists, check for loose screws or misaligned parts and tighten them as needed.
Refer to the Singer 99K manual for detailed guidance on maintaining optimal performance and reducing operational noise.
Using Attachments and Accessories
The Singer 99K supports various attachments like the overedge foot to enhance sewing capabilities. Install them as per the manual and explore accessories to expand functionality.
Overview of Available Attachments
The Singer 99K sewing machine offers a variety of attachments to enhance your sewing experience. These include the overedge foot, zipper foot, and buttonhole attachments, designed to handle specific tasks with precision. Additional accessories like specialized presser feet and extension tables expand the machine’s capabilities, allowing for efficient handling of diverse fabrics and stitching requirements. These attachments are typically available through Singer-authorized suppliers or vintage sewing shops, ensuring compatibility and optimal performance for your Singer 99K.
Installing and Using the Overedge Foot
Installing the overedge foot on the Singer 99K is straightforward. First, remove the standard presser foot and attach the overedge foot by aligning the shank and securing it firmly. Ensure the foot is compatible with your machine, as specified in the Singer 99K manual. Once installed, guide the fabric edge under the foot to achieve clean, professional finishes on seams, preventing fraying effectively. This attachment is particularly useful for sewing knits and delicate fabrics, enhancing the quality of your projects.
Other Useful Accessories
Beyond the overedge foot, the Singer 99K supports various attachments to expand its functionality. The zipper foot is ideal for sewing zippers and thick fabrics, while the seam guide helps maintain straight stitching. Additional accessories like the buttonhole attachment and quilting bar can enhance your sewing experience. These tools, available through Singer-authorized retailers, ensure compatibility and optimal performance, allowing you to tackle a wide range of sewing projects with precision and ease.
Electrical Information
The Singer 99K operates on alternating or direct current, with a motor located at the back. Use a three-pin safety plug for secure connection to the power source.
Power Requirements
The Singer 99K operates on both alternating and direct current. Use the three-pin safety plug for a secure connection to the power source. Ensure the voltage matches the machine’s specifications to prevent damage. The motor, located at the back, is designed for efficient operation. Proper electrical setup guarantees safe and reliable sewing, allowing you to enjoy consistent performance with your Singer 99K sewing machine.
Connecting the Machine to a Power Source
Insert the three-pin safety plug into the terminal block on the machine’s right side. Connect the other end to a compatible power source. Ensure the voltage matches the machine’s requirements. Avoid using damaged cords or incorrect adapters to prevent electrical hazards. Always use genuine Singer parts for safety. Turn off the machine before unplugging to avoid sparking. Proper connection ensures smooth operation and protects the motor from damage.
Using the Speed Controller
The Singer 99K features a speed controller, allowing you to adjust stitching speed for various fabrics and tasks. Locate the speed control dial or lever, typically positioned for easy access. Turn the dial to increase or decrease sewing speed based on your needs. This feature ensures precise control, enabling smooth operation for delicate materials or heavy-duty projects. Adjusting the speed enhances stitching accuracy and overall sewing efficiency, making it a versatile tool for both beginners and experienced sewists.
Advanced Sewing Techniques
Master advanced techniques like straight stitching, working with diverse fabrics, and enhancing your sewing experience with precision and creativity using the Singer 99K.
Mastering Straight Stitch Sewing
The Singer 99K excels at straight stitch sewing, ideal for precise fabric control. Set the stitch length and tension levers appropriately for your fabric type. Ensure the machine is well-oiled and maintained for smooth operation. Practice on scrap fabric to achieve consistent results. Adjust the tension dial to prevent thread breakage. Clean and oil the machine regularly to maintain optimal performance. With proper setup and care, the Singer 99K delivers professional-grade straight stitching for all your sewing projects.
Working with Different Fabrics
When using the Singer 99K, adapt to various fabrics by adjusting the tension dial and stitch length lever. Thicker fabrics like denim may require a larger needle size, while delicate materials need a finer one. Test settings on scrap fabric first to ensure proper tension and stitch formation. Regularly clean and oil the machine to maintain smooth operation across different fabric types. This ensures consistent results and extends the machine’s lifespan.
Enhancing Your Sewing Experience
Enhance your sewing experience with the Singer 99K by exploring its full potential through various attachments and techniques. Use the overedge foot for professional finishes and experiment with different stitches for creative projects. Regularly maintaining the machine ensures smooth operation, while consulting the manual or online resources provides tips for mastering advanced techniques. By familiarizing yourself with the machine’s capabilities, you can achieve professional-quality results and expand your sewing repertoire with ease and confidence.
The Singer 99K sewing machine offers timeless functionality and versatility, making it a cherished tool for both beginners and experienced sewists. With proper care and practice, it continues to inspire creativity and mastery in sewing projects, ensuring years of reliable service and artistic expression.
Final Tips for Optimal Performance
To ensure your Singer 99K sewing machine performs at its best, regular maintenance is essential. Always use Singer-branded oil to lubricate moving parts and avoid inferior alternatives that may damage the mechanism. Clean the machine thoroughly after use to prevent dust buildup. Check tension settings frequently and adjust as needed for consistent stitch quality. Store the machine in a dry, cool place to protect it from humidity and wear. By following these tips, you’ll extend the life of your machine and enjoy seamless sewing experiences for years to come.
Encouragement to Explore Further
With the Singer 99K, the possibilities for creativity are endless. Experiment with various fabrics and stitches to unlock its full potential. Join online communities or local sewing groups to share tips and inspire others. Vintage sewing enthusiasts often praise the 99K for its reliability and versatility. Dive into tutorials and explore advanced techniques to enhance your sewing skills. Remember, practice makes perfect, so keep creating and enjoying the timeless charm of this classic machine.