
The Honeywell T6 Thermostat is a smart, Wi-Fi-enabled device designed for seamless integration with smart home systems. It offers advanced temperature control, voice command compatibility, and energy-saving features. The installer manual provides detailed guidance for proper installation, configuration, and troubleshooting, ensuring optimal performance and user satisfaction.
Overview of the Honeywell T6 Thermostat
The Honeywell T6 Thermostat is a cutting-edge, Wi-Fi-enabled programmable thermostat designed for smart home integration. It offers advanced temperature control, energy efficiency, and seamless compatibility with Z-Wave systems. The thermostat features a user-friendly interface, voice command functionality, and scheduling options. The installer manual provides essential guidance for proper installation, configuration, and troubleshooting, ensuring optimal performance and energy savings. It is compatible with various HVAC systems and operates under specific environmental conditions, making it a versatile choice for modern homes.
Importance of the Installer Manual
The installer manual is crucial for ensuring proper installation and configuration of the Honeywell T6 Thermostat. It provides detailed guidance on wiring, system compatibility, and environmental requirements, helping technicians avoid common mistakes. The manual also includes troubleshooting tips and safety guidelines, ensuring safe and efficient setup. By following the manual, installers can guarantee compliance with HVAC standards and optimize the thermostat’s performance for energy efficiency and smart home integration.

Key Features of the Honeywell T6 Thermostat
The Honeywell T6 Thermostat offers a user-friendly interface, smart home compatibility, energy efficiency features, and a sleek, modern design for optimal heating and cooling control.
Design and Build Quality
The Honeywell T6 Thermostat boasts a sleek, modern design with a high-resolution touchscreen display, ensuring an intuitive user experience. Its durable build quality ensures long-lasting performance, while the compact design allows seamless installation on any wall. The thermostat is constructed with high-quality materials, providing resistance to environmental factors and ensuring reliable operation. Additionally, the optional decorative cover plate enhances its aesthetic appeal, making it a stylish addition to any home. The device is built to withstand various environmental conditions, ensuring optimal functionality and durability.
Smart Home Compatibility
The Honeywell T6 Thermostat seamlessly integrates with the Honeywell Home app, enabling users to adjust settings, monitor energy usage, and create custom schedules remotely. It also supports voice commands via Amazon Alexa and Google Assistant, allowing users to control their home environment hands-free. Additionally, it is Z-Wave compatible, enabling integration with various smart home systems and devices for a unified smart home experience. This versatile compatibility ensures the T6 thermostat fits effortlessly into any smart home ecosystem, providing a comprehensive and convenient temperature control solution. By connecting to these platforms, the T6 enhances overall smart home functionality, offering a user-friendly experience and efficient energy management.
Energy Efficiency Features
The Honeywell T6 Thermostat offers advanced energy efficiency features, including geofencing, smart scheduling, and energy usage tracking. It learns your temperature preferences and adjusts settings to optimize energy use while maintaining comfort. The thermostat also supports energy-saving modes and integrates with smart home systems to reduce waste. With features like automatic adjustments based on your location and schedule, the T6 helps lower energy bills while ensuring your home remains comfortable. These tools make it easy to balance efficiency and convenience, enhancing your overall energy management experience.
User-Friendly Interface
The Honeywell T6 Thermostat features an intuitive, user-friendly interface designed for easy navigation. Its high-resolution touchscreen display provides clear temperature readings and simple menu options. The thermostat also supports voice control through smart home systems like Amazon Alexa and Google Assistant, allowing hands-free adjustments. Additionally, the Honeywell Home app offers remote access, enabling users to adjust settings, view energy usage, and receive notifications from their smartphones. These features ensure a seamless and convenient user experience, making it easy to manage your home’s temperature efficiently.

System Requirements for Installation
The Honeywell T6 Thermostat requires compatibility with standard HVAC systems, a stable power supply, and proper wiring connections. It operates within a temperature range of -40°C to 65°C and is designed for indoor use, ensuring reliable performance in typical household environments.
Compatibility with HVAC Systems
The Honeywell T6 Thermostat is designed to work seamlessly with most standard HVAC systems, including forced air, heat pumps, and radiant floor systems. It supports both gas and electric heating, as well as dual-fuel systems, ensuring versatile compatibility. The thermostat is also compatible with conventional 24V and heat pump systems, making it suitable for a wide range of installations. Proper HVAC system compatibility ensures efficient temperature control and optimal performance, which are essential for maintaining comfort and energy efficiency in any home.
Environmental Conditions for Installation
The Honeywell T6 Thermostat should be installed in environments with temperatures between -40°C and 65°C (-40°F and 149°F) to ensure optimal performance. It should be placed at least 1.2 to 1.5 meters above the floor, away from direct sunlight, heat sources, and drafts. The thermostat is designed to operate in areas with IP66 rating, offering protection against dust and water splashes. Avoid installing it near corrosive substances or excessive moisture to maintain reliability and longevity of the device.
Technical Specifications
The Honeywell T6 Thermostat operates within a temperature range of -40°C to 65°C (-40°F to 149°F) and is IP66 rated, ensuring protection against dust and water splashes. It supports Z-Wave and Wi-Fi connectivity for seamless smart home integration. The device is compatible with various HVAC systems and requires a 24V AC power supply. Its compact design and high-resolution display ensure user-friendly operation. The thermostat also features voice control through platforms like Amazon Alexa and Google Assistant, enhancing convenience and modern smart home functionality.

Pre-Installation Checklist
Verify system compatibility, check voltage requirements, and ensure all tools and materials are available. Confirm the installation site meets environmental conditions and review the manual for specific instructions.
Tools and Materials Needed
To install the Honeywell T6 Thermostat, you will need a screwdriver, drill, and wall anchors. Additional materials include a level, voltage tester, and wiring connectors. Ensure you have the thermostat unit, UWP mounting system, decorative cover plate, and screws provided in the package. Verify that your HVAC system is compatible and that you have a stable Wi-Fi connection for smart features. Refer to the manual for any system-specific tools or materials required for your setup.
Understanding the Package Contents
Your Honeywell T6 Thermostat package includes the T6 Pro Thermostat, UWP Mounting System, Decorative Cover Plate, and screws for installation. Additionally, you may find a J-box adapter for mounting on an electrical junction box. The thermostat unit itself features a touchscreen display and Wi-Fi connectivity for smart home integration. Ensure all components are accounted for before starting the installation process. Refer to the manual for detailed descriptions of each part and its purpose.
Preparing the Installation Site
Before installing the Honeywell T6 Thermostat, ensure the installation site is prepared. Choose a location 1.2 to 1.5 meters above the floor, away from direct sunlight, drafts, and heat sources. Verify the area is clear of obstacles and paint gaps are covered using the optional Decorative Cover Plate. Turn off power to the HVAC system at the circuit breaker to ensure safe installation. Remove the old thermostat and clean the wall surface to prevent any debris interference with the new mounting system.
Installation Process
The Honeywell T6 Thermostat installation involves mounting the device, connecting wires, and linking it to your HVAC system and power source. Follow step-by-step instructions carefully.
Step-by-Step Guide to Mounting the Thermostat
To mount the Honeywell T6 Thermostat, ensure the power to your HVAC system is turned off. Remove the old thermostat and prepare the installation site. Use the provided screws and wall anchors to secure the base plate to the wall. Align the plate carefully to ensure a level installation. If needed, attach the optional decorative cover plate for a polished look. Finally, snap the thermostat unit onto the base plate, ensuring it clicks securely into place. This ensures proper functionality and aesthetic appeal. Always follow safety guidelines during installation.
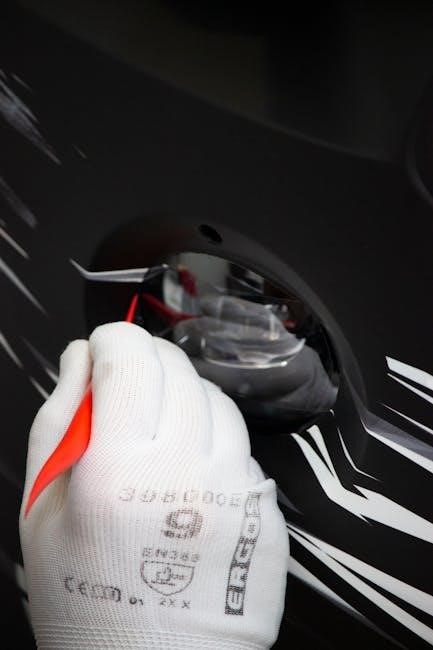
Wiring Instructions
Before wiring, ensure the power to your HVAC system is off. Identify the terminal labels on your existing thermostat and match them to the Honeywell T6 terminals. Connect the wires carefully, ensuring no loose connections. If your system uses a common wire, connect it to the “C” terminal. For systems without a common wire, the T6 may require a power bridge or adapter. Use the provided wiring labels or consult the manual for specific configurations. Double-check all connections for accuracy and security before restoring power to the system.
Connecting to Power and HVAC Systems
Ensure the power to your HVAC system is turned off before connecting the thermostat. Connect the wires to the appropriate terminals on the T6, matching them to your system’s requirements. If a common wire is present, attach it to the “C” terminal. For systems without a common wire, use the provided power bridge or adapter. Verify the HVAC system type (heat pump, furnace, or dual-fuel) and configure the thermostat accordingly. Secure all connections firmly and restore power to test the system’s operation.
Final Installation Checks
After completing the installation, perform a series of final checks to ensure everything functions correctly. Verify that all wire connections are secure and match the HVAC system requirements. Turn the power back on and test the thermostat by adjusting the temperature to confirm the HVAC system responds. Check for any error messages or unusual behavior. Review the setup to ensure schedules and preferences are correctly programmed. Finally, consult the user guide for troubleshooting tips if any issues arise during the testing phase.
Configuration and Setup
Configure the Honeywell T6 by following the initial setup guide, programming schedules, and adjusting preferences. Use the Honeywell Home app for remote control and advanced settings.
Initial Setup and Programming
After installation, power up the T6 thermostat. The screen displays “SETUP.” Use the Honeywell Home app to configure basic settings like temperature units and Wi-Fi connection. Program daily schedules by setting preferred temperatures for different times. Ensure the system is synchronized with your HVAC setup. Refer to the manual for step-by-step guidance on binding components and initializing operation. Proper setup ensures efficient performance and smart home integration.
Setting Up Schedules and Preferences
Open the Honeywell Home app to create custom schedules and preferences. Set temperature adjustments for different times of the day, optimizing comfort and energy use. Adjust settings like geofencing, smart recovery, and temperature limits. Enable features like vacation mode for extended periods away. Customize the thermostat’s display, including brightness and units. Ensure all preferences align with your lifestyle for enhanced efficiency and convenience. Properly configured schedules and settings maximize the T6’s performance and energy-saving capabilities.
Advanced Configuration Options
The Honeywell T6 thermostat offers advanced settings for personalized control. Use the Honeywell Home app to enable geofencing, which adjusts temperatures based on your location. Activate smart recovery to pre-heat or cool your home before you arrive. Configure temperature hold options to override schedules temporarily. Adjust advanced fan settings for optimal airflow and energy efficiency. Enable Z-Wave integration for seamless smart home system control. These features allow you to tailor the thermostat’s performance to your specific needs, enhancing comfort and energy savings. Proper configuration ensures maximum efficiency and convenience.
Integration with Smart Home Systems
The Honeywell T6 integrates seamlessly with Z-Wave and other smart systems, enabling voice control through platforms like Amazon Alexa and Google Assistant. Use the Honeywell Home app for configuration and automation, enhancing your smart home experience with remote temperature adjustments and system-wide coordination.
Connecting to the Honeywell Home App
Download and install the Honeywell Home app from the App Store or Google Play. Launch the app and create an account or log in if you already have one. Select the Honeywell T6 thermostat model from the list of available devices. Follow the in-app instructions to pair the thermostat with your smart device. Ensure the thermostat is powered on and connected to your home’s Wi-Fi network. The app will guide you through the setup process, allowing you to configure settings, schedules, and preferences for optimal performance. Use the app to enable voice control and smart home integrations.
Voice Control Integration
The Honeywell T6 Thermostat supports voice control through integration with Amazon Alexa and Google Assistant. To enable this feature, link your Honeywell Home account with your preferred voice assistant platform. Once connected, you can adjust temperatures, switch modes, or check current settings using voice commands. For example, say, “Set the living room to 72 degrees,” or “Turn off the thermostat.” This integration enhances convenience, allowing hands-free control and seamless smart home management. Ensure your thermostat is connected to Wi-Fi and properly configured in the Honeywell Home app for voice commands to function effectively.
Z-Wave and Other Smart Home Compatibility
The Honeywell T6 Thermostat is Z-Wave certified, enabling integration with compatible smart home systems. This allows control through Z-Wave hubs like Samsung SmartThings or Wink. Additionally, it supports other protocols, ensuring compatibility with various smart devices. By connecting your T6 to these systems, you can create automation scenes, monitor energy usage, and control the thermostat remotely. Ensure your hub is Z-Wave compatible and follow the manual’s pairing instructions for a seamless setup. This integration enhances home automation and energy efficiency, making it a versatile choice for modern smart homes.
Troubleshooting Common Issues
Identify and resolve issues like screen malfunctions or connectivity problems by checking wiring, resetting the device, or updating software. Consult the manual for detailed solutions.
Identifying and Solving Installation Problems
Common installation issues with the Honeywell T6 Thermostat include wiring errors, power supply problems, or improper mounting. Ensure all connections match the HVAC system and verify power requirements. If the thermostat doesn’t turn on, check the circuit breaker or fuse. For display issues, restart the device or reset it using the manual instructions. Advanced features like smart home integration may require reconfiguration. Always refer to the installer manual for troubleshooting steps or contact Honeywell support for assistance. Regular software updates ensure optimal performance and resolve potential bugs.
Common Errors and Solutions
During installation, common errors include incorrect wiring, insufficient power supply, or improper thermostat mounting. Ensure all wires are securely connected to the correct terminals. If the display doesn’t light up, check the power source and circuit breaker. For connectivity issues, restart the thermostat and router. Refer to the manual for wiring diagrams and troubleshooting guides. If issues persist, contact Honeywell support or consult the installer manual for advanced solutions to resolve these problems effectively.
Resetting the Thermostat
To reset the Honeywell T6 Thermostat, remove the batteries and press the reset button located on the back of the device. Hold for 5 seconds until the screen goes blank. Reinstall the batteries to restore factory settings. This process clears schedules and preferences, requiring reconfiguration. If issues persist after resetting, contact Honeywell support for further assistance. Ensure proper setup after resetting to maintain optimal performance and functionality.

Maintenance and Care
Regularly clean the thermostat to prevent dust buildup. Check for software updates to ensure optimal performance. Replace batteries as needed to maintain functionality and reliability.
Cleaning and Upkeep Tips
Regularly clean the Honeywell T6 Thermostat with a soft, dry cloth to remove dust and fingerprints. Avoid using harsh chemicals or abrasive materials that could damage the screen. Gently wipe the display to ensure visibility and responsiveness. Do not immerse the thermostat in water or expose it to excessive moisture. For optimal performance, keep the device away from direct sunlight, heat sources, and drafts. Ensure the thermostat is mounted at least 1.2 to 1.5 meters above the floor for accurate temperature readings and reliable operation.
Software Updates and Firmware
Regular software updates ensure the Honeywell T6 Thermostat operates with the latest features and security enhancements. Use the Honeywell Home app to check for firmware updates and install them automatically. Always connect the thermostat to your Wi-Fi network to receive update notifications. Updates may improve performance, add new functionalities, or fix issues. To maintain optimal functionality, avoid physical damage to the device and ensure proper installation. Follow the manual for detailed update instructions and troubleshooting tips if updates fail to install correctly.
Battery Care and Replacement
The Honeywell T6 Thermostat may require battery replacement to maintain proper functionality. Use high-quality, alkaline batteries (AA or 3V) for optimal performance. Avoid mixing old and new batteries or using rechargeable types. Replace batteries when the thermostat displays a low-battery warning. Ensure the device is powered off during replacement to prevent data loss. Dispose of old batteries responsibly, following local recycling guidelines. Clean the battery terminals with a soft cloth to ensure good connectivity. Refer to the manual for detailed steps and safety precautions during replacement.

Safety Guidelines
Ensure power is off before handling electrical components. Avoid exposing the thermostat to direct sunlight or heat sources. Keep it at least 1.2 meters above the floor for accurate readings.
Handling Electrical Components Safely
When handling electrical components of the Honeywell T6 Thermostat, ensure the power supply is switched off at the circuit breaker. Verify there is no electricity present using a voltage tester. Avoid touching live wires or terminals to prevent electric shock. Use insulated tools to minimize risk. Follow all local safety regulations and guidelines. If unsure, consult a licensed HVAC technician for assistance. Proper grounding and insulation are crucial to ensure safe installation and operation. Always refer to the manual for specific safety precautions.
Proper Placement and Installation
Install the Honeywell T6 Thermostat at least 1.2 to 1.5 meters above the floor to ensure accurate temperature readings. Avoid placing it near drafts, direct sunlight, or heat sources, as this may affect performance. Mount the thermostat on a flat, dry wall surface, away from gas appliances or flammable materials. Use the provided UWP Mounting System for secure installation. Ensure the device is level and properly aligned. If necessary, use the decorative cover plate to conceal any paint gaps or uneven surfaces. Follow the manual for precise placement guidelines.
Disposal and Recycling Information
Dispose of the Honeywell T6 Thermostat and its components in an environmentally responsible manner. Battery recycling programs accept lithium or alkaline batteries, while electronic waste facilities handle the thermostat unit. Ensure proper disposal of packaging materials, following local recycling guidelines. For hazardous waste, such as mercury-containing batteries, use designated collection points. Visit Honeywell’s official website or consult local authorities for certified recycling centers. Proper disposal helps minimize environmental impact and adheres to safety regulations.

Warranty and Support
Honeywell offers comprehensive warranty coverage and dedicated customer support for the T6 Thermostat. Visit their official website for detailed warranty terms, troubleshooting guides, and contact information.
Understanding the Warranty Terms
The Honeywell T6 Thermostat is backed by a limited warranty that covers parts and labor for a specified period, typically ranging from 1 to 5 years, depending on the product and region. To validate the warranty, the thermostat must be installed by a licensed HVAC technician. Registration on Honeywell’s official website may be required to activate warranty benefits. For detailed terms, exclusions, and conditions, refer to the warranty agreement provided in the installer manual or visit Honeywell’s support page.
Contacting Honeywell Support
For assistance with the Honeywell T6 Thermostat, users can contact Honeywell Support through various channels. Visit the official website for live chat, email support, or to find regional contact numbers. The Honeywell Home app also offers troubleshooting guides and FAQs. Additionally, registered users can access exclusive support resources. Ensure to have the product serial number ready for efficient service. Customer support is available to address installation, configuration, or operational issues, ensuring a prompt resolution to any queries or concerns.
Additional Resources and Documentation
For comprehensive support, Honeywell provides additional resources and documentation. Download the Honeywell T6 Installer Manual as a PDF for detailed instructions. The Honeywell Home app offers interactive guides and troubleshooting tips. Visit the official Honeywell website for FAQs, technical specifications, and video tutorials. Additional resources include user manuals, installation checklists, and Compatibility guides. These materials ensure installers and users have access to everything needed for successful setup and operation of the T6 Thermostat.
The Honeywell T6 Thermostat is a valuable addition to any smart home system, offering energy efficiency and comfort. Follow the manual for optimal performance and explore advanced features for enhanced control. Refer to the resources provided for further assistance and troubleshooting.
Begin by preparing tools and materials, ensuring compatibility with your HVAC system. Mount the thermostat using the UWP system or J-box adapter, following placement guidelines. Carefully connect wires according to the wiring diagram in the manual. Power the system and test functionality. Finally, configure settings using the Honeywell Home app or thermostat interface. Ensure all connections are secure and perform a final check to confirm proper operation. Proper installation ensures optimal performance and energy efficiency.
Final Tips for Optimal Performance
Ensure regular software updates for enhanced functionality. Place the thermostat away from direct sunlight and drafts to maintain accurate temperature readings. Clean the device periodically to prevent dust buildup. Schedule routine maintenance to check wiring and connections. Use the Honeywell Home app to monitor and adjust settings for energy efficiency. Proper placement, at least 1.2 meters above the floor, ensures precise temperature control. Regularly review and update schedules to align with your lifestyle for optimal comfort and energy savings.
Next Steps After Installation
After completing the installation, download and install the Honeywell Home app to configure your T6 thermostat. Register your device and set up schedules tailored to your lifestyle. Explore advanced features like geofencing and smart home integration for enhanced convenience. Regularly review and update your settings to optimize energy efficiency. For additional support, visit the Honeywell website or consult the user manual for troubleshooting tips and maintenance recommendations. Ensure all features are fully utilized for a seamless smart home experience.