Welcome to the Audio-Technica AT-LP120-USB Manual, your comprehensive guide to setting up and using this professional USB and analog turntable system. This manual provides detailed instructions for optimal performance and troubleshooting, ensuring you make the most of your vinyl recording and playback experience with this versatile and high-quality turntable.
Overview of the AT-LP120-USB Turntable
The Audio-Technica AT-LP120-USB is a direct-drive professional turntable designed for both vinyl enthusiasts and DJs. It features a sturdy, aluminum platter and a high-torque motor for consistent rotation. The turntable supports 33 and 45 RPM speeds, with a selectable switch for easy adjustment. Equipped with a USB output, it allows direct connection to computers for digitizing vinyl records using the included Audacity software. The AT-LP120-USB also includes RCA outputs for traditional analog connections to audio systems. Its robust design, adjustable counterweight, and anti-skate control ensure precise tracking and high-quality sound reproduction. This versatile turntable is ideal for transferring vinyl collections to digital formats while maintaining professional-grade performance and durability.
Key Features and Benefits
The Audio-Technica AT-LP120-USB offers a range of features that make it a versatile and powerful tool for vinyl enthusiasts. Its direct-drive motor ensures consistent speed and torque, reducing vibration and noise during playback. The turntable supports both 33 and 45 RPM formats, making it suitable for a wide variety of records. The built-in USB interface allows seamless connection to computers, enabling easy digital recording via Audacity software. Additional features include a selectable phono/line switch, adjustable anti-skate control, and a target light for precise needle placement. These features, combined with its durable construction and professional-grade performance, make the AT-LP120-USB an excellent choice for both home use and professional applications, providing high-quality sound reproduction and versatile functionality.
Contents of the Box
The box includes the Audio-Technica AT-LP120-USB turntable, dust cover, felt mat, platter, counterweight, headshell with VM stereo cartridge, 45 RPM adapter, stylus target light, and USB cable.
Accessories Included
The Audio-Technica AT-LP120-USB turntable comes with a range of essential accessories to enhance your vinyl experience. Inside the box, you’ll find a dust cover to protect the turntable when not in use, a felt mat for smooth record placement, and a platter to ensure stable rotation. Additionally, a counterweight is included for precise tonearm balancing, and a headshell equipped with the VM stereo cartridge (AT-VM95E) is provided for optimal sound reproduction. A 45 RPM adapter is also included for compatibility with both 33 RPM and 45 RPM records. The package further includes a stylus target light for accurate needle placement and an AC adapter for power supply. Rounding out the accessories is a USB cable for connecting to your computer and a quick start guide to help you get started.
Software and Manual
The Audio-Technica AT-LP120-USB turntable is bundled with essential software and documentation to streamline your experience. Audacity recording software is included for both MAC and PC, enabling you to easily digitize your vinyl records. The user manual provides detailed instructions for setting up, operating, and maintaining the turntable, ensuring optimal performance. It covers topics such as connecting the turntable to a computer or audio system, adjusting settings, and troubleshooting common issues. Additionally, a quick start guide is provided for those looking to begin recording immediately. Both the manual and software are designed to be user-friendly, making it easy for newcomers and experienced users alike to get the most out of their turntable. The manual is also available for download online if needed.
Technical Specifications
The Audio-Technica AT-LP120-USB features dimensions of 450 x 352 x 157 mm and weighs 10700 grams. It boasts a signal-to-noise ratio (SNR) of 50 dB and supports both USB and analog interfaces for versatile connectivity.
Product Dimensions and Weight
The Audio-Technica AT-LP120-USB turntable measures 450 x 352 x 157 mm and weighs 10700 grams, making it compact yet durable. Its robust design ensures stability during operation, while its manageable size allows for easy placement in various settings, whether for professional DJ use or home setups. The turntable’s weight contributes to its solid build, minimizing vibrations and ensuring smooth playback. These dimensions and weight make it an ideal choice for both portability and performance, catering to the needs of vinyl enthusiasts and professionals alike. The product’s design balances functionality and convenience, offering a reliable solution for converting vinyl records to digital formats with ease.
Signal-to-Noise Ratio and Supported Formats
The Audio-Technica AT-LP120-USB turntable boasts a signal-to-noise ratio (SNR) of 50 dB, ensuring clear and high-quality audio playback. It supports a wide range of formats, including both 33 RPM and 45 RPM vinyl records, catering to diverse vinyl collections. Additionally, the turntable is compatible with USB and analog interfaces, providing flexibility for users to connect to computers, audio systems, or external devices. Its versatility allows for seamless conversion of vinyl records to digital files using the included Audacity software, making it an excellent choice for both analog purists and digital enthusiasts. This combination of performance and compatibility ensures the AT-LP120-USB meets the needs of various users, from casual listeners to professional DJs.

Setting Up the Turntable
Unbox and inspect the turntable, then assemble by attaching the platter, counterweight, and cartridge. Connect via USB or RCA cables, and ensure the turntable is leveled for optimal performance.
Unboxing and Initial Inspection
When you unbox the Audio-Technica AT-LP120-USB, ensure all components are included: turntable body, dust cover, felt mat, platter, counterweight, headshell with cartridge, 45 RPM adapter, stylus target light, AC adapter, USB cable, RCA audio cable, and quick start guide. Inspect each part for damage or defects. If any items are missing or damaged, contact your local Audio-Technica dealer immediately. Carefully remove protective packaging materials and place the turntable on a stable, flat surface. Use the quick start guide to familiarize yourself with the layout and controls. This initial inspection ensures a smooth setup process and proper functionality of your turntable.
Assembling the Turntable
Begin by carefully unpacking and preparing the components. Attach the headshell to the tone arm, ensuring it clicks securely into place. Next, mount the counterweight on the tone arm, adjusting its position to balance the arm properly. Place the platter on the spindle and cover it with the felt mat. Install the 45 RPM adapter if needed for playing 7-inch records. Gently lower the dust cover and ensure all cables are securely connected. Follow the quick start guide for precise assembly steps. If uncertain, refer to the detailed diagrams in the Audio-Technica AT-LP120-USB manual. Proper assembly ensures optimal performance and longevity of your turntable.
Connecting to a Computer or Audio System
To connect the Audio-Technica AT-LP120-USB, use the provided USB cable for direct connection to your computer. This allows digital recording via Audacity software. For analog setups, connect the RCA audio cables to your amplifier, receiver, or active speakers. Ensure the pre-amplifier selector switch is set correctly for your equipment. Plug in the AC adapter and power on the turntable. If using external speakers, connect them to your amplifier. For digital recording, install Audacity software and configure it to recognize the turntable as the audio source. Refer to the manual for detailed cable connections and settings to ensure proper functionality and high-quality sound output from your AT-LP120-USB turntable.

Using the AT-LP120-USB
Place your record on the platter, align the tone arm, and enjoy high-quality playback. Use the stylus target light for precise needle placement. Switch between 33 RPM and 45 RPM easily. Record directly to your computer via USB using Audacity software. Always handle records by the edges and clean the stylus regularly for optimal sound quality.
Playing Vinyl Records
Place your vinyl record on the turntable’s platter, ensuring it is centered and secure. Gently lift the tone arm, aligning the stylus with the record’s groove. Use the stylus target light for precise needle placement. Start playback by moving the tone arm to the desired track or pressing the play button. Adjust the counterweight for optimal tracking force. Select the correct speed (33 RPM or 45 RPM) using the pitch control. Connect to your audio system via RCA cables or record digitally using the USB output and Audacity software. Handle records by the edges to avoid dust and fingerprints, ensuring clear playback. Regularly clean the stylus and record surface for optimal sound quality.
Switching Between 33 RPM and 45 RPM
To switch between 33 RPM and 45 RPM on the Audio-Technica AT-LP120-USB, locate the speed selector knob on the top right of the turntable. For 33 RPM, ensure the knob is set to “33.” For 45 RPM, move the knob to “45.” When playing 45 RPM records, use the included 45 RPM adapter for proper playback. After selecting the speed, gently place the needle on the record. The turntable automatically adjusts to the selected speed, ensuring accurate playback. For fine adjustments, use the pitch control to +/- 10% for precise tempo matching. This feature is ideal for DJs and vinyl enthusiasts needing flexibility between record formats. Always handle the needle and records with care to avoid damage.
Using the Stylus Target Light
The Audio-Technica AT-LP120-USB features a built-in stylus target light, designed to illuminate the record groove for precise needle placement. This blue LED light is especially useful in low-light conditions, helping you align the stylus accurately with the record’s edge. To activate the light, press the stylus target light button located on the turntable’s top panel. Ensure the light is turned on before cueing records to avoid accidental needle drops. The light automatically turns off after a few seconds to conserve energy. For optimal performance, clean the stylus regularly and handle it gently to maintain sound quality and prevent damage to your records or the cartridge.
Adjusting the Tone Arm
To ensure optimal performance, the tone arm on your Audio-Technica AT-LP120-USB must be properly adjusted. Begin by placing the turntable on a flat surface and loosening the tone arm locking clip. Move the tone arm to the right position and adjust the counterweight until it balances horizontally. Use a tracking force scale to set the recommended force of 4-5 grams. Adjust the anti-skate knob to match the tracking force. Tighten the locking clip gently to secure the tone arm. Be careful not to over-tighten, as this could damage the stylus or records. Regular cleaning of the stylus and checking cartridge alignment will maintain sound quality and prevent wear.
Maintenance and Troubleshooting
Regularly clean the turntable and check the stylus for damage. Ensure proper cartridge alignment and refer to the manual for troubleshooting common issues like skipping or distorted sound.
Cleaning the Turntable
Regular cleaning is essential to maintain the performance and longevity of your Audio-Technica AT-LP120-USB turntable. Start by gently wiping the platter, tone arm, and exterior surfaces with a soft, dry cloth to remove dust and debris. For more thorough cleaning, dampen the cloth with distilled water, but avoid harsh chemicals or alcohol, as they may damage the finish or components. Use a carbon fiber brush to clean the stylus, brushing from the back to the front to remove dust and residue. Never touch the stylus needle, as oils from your skin can cause damage. Finally, inspect the turntable mat and clean it with a soft brush or mild soap solution if necessary. Regular maintenance ensures optimal sound quality and prevents wear and tear.
Replacing the Stylus
To replace the stylus on your Audio-Technica AT-LP120-USB, first ensure the turntable is powered off and the tone arm is securely locked. Carefully lift the tone arm and remove the headshell by unscrewing the retaining clip. Gently pull the old stylus from the cartridge slot, taking note of its orientation for proper installation. Insert the new stylus, ensuring it aligns correctly and clicks into place. Reattach the headshell and adjust the counterweight using the Allen wrench to achieve proper tone arm balance. Finally, test the stylus by playing a record to ensure optimal sound quality. Always handle the stylus by the body to avoid damaging the needle. Regular replacement is recommended every 500-1,000 hours of use to maintain sound clarity and prevent record wear.
Common Issues and Solutions
If the turntable experiences uneven rotation, check the platter and motor for dust or debris. Clean gently with a soft cloth. For low audio output, ensure the RCA cables are securely connected and the pre-amplifier switch is set correctly. If the stylus skips, adjust the tracking force using the counterweight or consult the manual for proper calibration. For USB connectivity issues, restart your computer and ensure the turntable is properly connected. If Audacity software fails to record, reinstall the software or update drivers. For persistent noise, verify grounding wires are correctly connected to prevent static interference. Regular maintenance, such as cleaning the turntable and inspecting the stylus, can prevent many common issues and ensure optimal performance.
Manual and Software
The Audio-Technica AT-LP120-USB Manual provides detailed setup, operation, and troubleshooting guides. It includes Audacity software for digitizing records and offers resources for optimal performance and maintenance.
Understanding the User Manual
The Audio-Technica AT-LP120-USB Manual is a comprehensive guide designed to help users optimize their experience with the turntable. It covers everything from initial setup to advanced features, ensuring seamless operation. The manual begins with an introduction, followed by detailed instructions for assembling and connecting the turntable to both computers and audio systems. It also includes troubleshooting tips and maintenance advice to extend the product’s lifespan. Key sections focus on using the USB interface, switching between RPM speeds, and adjusting the tone arm for precise playback. The manual is accompanied by visual guides and step-by-step instructions, making it user-friendly for both novices and experienced users; Additionally, it provides resources for further assistance, such as contacting customer support or visiting the official Audio-Technica website.
Installing and Using Audacity Software
Audacity is a free, open-source recording software included with the Audio-Technica AT-LP120-USB turntable. To install Audacity, download it from the official website and follow the installation wizard. Once installed, connect your turntable to your computer via USB and configure Audacity to recognize the turntable as the input device. Open Audacity, go to Preferences, and select the turntable under Recording settings. Start recording by clicking the Record button and play your vinyl. After recording, you can edit the audio, remove noise, and export it as WAV or MP3. This software is essential for digitizing your vinyl collection and enhancing audio quality. Refer to the Audio-Technica AT-LP120-USB Manual for detailed setup instructions.
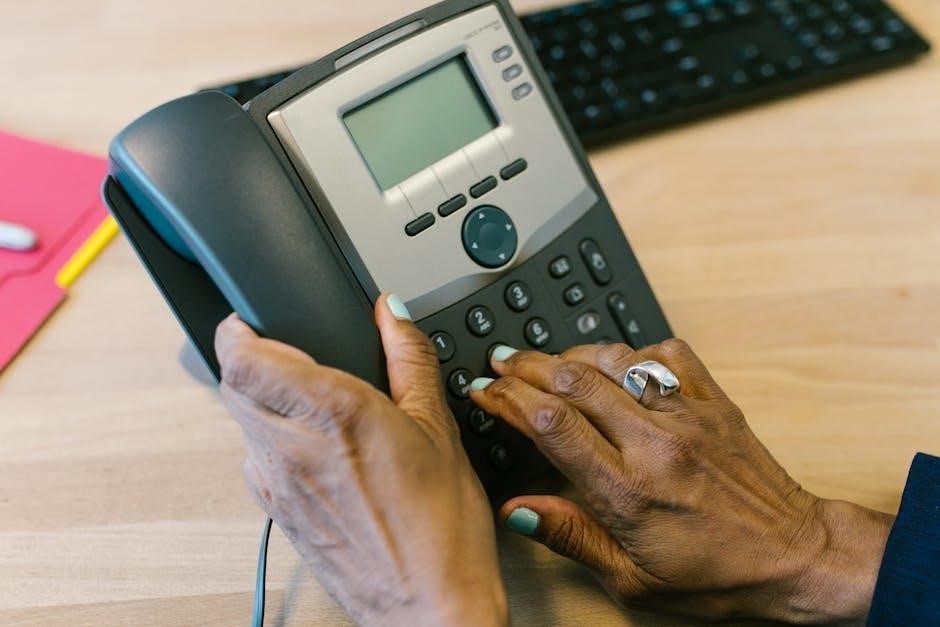
Additional Resources and Support
For further assistance with the Audio-Technica AT-LP120-USB, visit the official Audio-Technica website for downloadable resources, including the complete PDF manual. Explore the FAQ section for answers to common questions and troubleshooting tips. Additionally, join the Audio-Technica community forums to connect with other users, share experiences, and gain insights. For direct support, contact Audio-Technica customer service via phone or email. The Quick Start Guide included in the box provides a concise overview, while online tutorials offer step-by-step guidance for advanced features. These resources ensure you maximize your turntable’s potential and resolve any issues efficiently.
The Audio-Technica AT-LP120-USB Manual provides a comprehensive guide to unlocking the full potential of your turntable. From setup and operation to maintenance and troubleshooting, this manual ensures a seamless experience for both beginners and seasoned vinyl enthusiasts. With its versatile USB and analog capabilities, the AT-LP120-USB is a reliable tool for digitizing your vinyl collection or enjoying high-quality audio playback. By following the instructions and tips outlined in this manual, you can optimize performance, extend the lifespan of your turntable, and explore the world of vinyl with confidence. Whether you’re a professional DJ or a hobbyist, this turntable, combined with the resources provided, will enhance your audio journey and deliver exceptional results.