Film camera manuals are comprehensive guides essential for understanding and operating analog cameras. They detail components, shooting techniques, and maintenance, often available as free PDF downloads online.
1.1 Importance of Film Camera Manuals
Film camera manuals are vital for understanding camera mechanics, troubleshooting, and maintenance. They provide detailed instructions on loading film, setting exposures, and using accessories. These guides help photographers optimize their camera’s performance, whether for creative control or technical precision. With many manuals available for free online, they remain an invaluable resource for both beginners and experienced photographers working with vintage or analog equipment.
1.2 Evolution of Film Camera Manuals
Film camera manuals have evolved from printed booklets to digital PDFs, accessible online for free. Early manuals were detailed, often including diagrams, while modern versions are scanned or translated for convenience. Websites like Butkus.org have preserved these resources, ensuring accessibility for photographers. The shift to digital formats has made manuals more widely available, supporting the resurgence of analog photography.
1.3 Where to Find Film Camera Manuals
Film camera manuals are widely available online for free, often in PDF format. Websites like Butkus.org, ManualsLib, and Pentax User offer extensive libraries of downloadable manuals for various models. Many sites, such as Butkus.org, have been preserving these resources since 1997, with donations sometimes appreciated. These manuals cover models from brands like Minolta, Kodak, and Pentax, ensuring accessibility for photographers and enthusiasts.
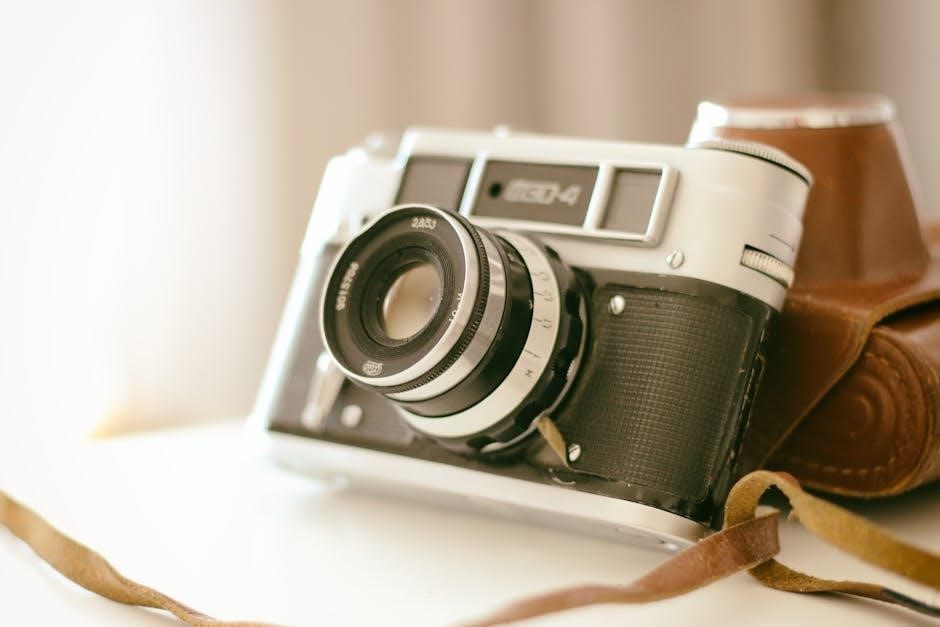
Understanding Your Film Camera Components
Understanding your film camera components is essential for effective photography. The lens focuses light, the viewfinder aids composition, the shutter controls exposure, and the film advance manages loading and movement.
2.1 Lens and Aperture
The lens captures and focuses light, while the aperture regulates light entry. Aperture settings (f-stops) control depth of field, with smaller f-stops (e.g., f/2.8) allowing more light and shallower focus. Adjusting aperture and film speed (ASA/ISO) ensures proper exposure. Proper lens care and understanding aperture priority modes enhance image quality, making the lens and aperture fundamental to achieving desired photographic effects.
2.2 Viewfinder and Focusing
The viewfinder allows precise composition and focusing. Types include rangefinder, TTL (Through-The-Lens), and waist-level finders. Focus by adjusting the lens or using built-in mechanisms. Ensure sharp images by aligning focus marks or using split-prism aids. Proper eye positioning and steady camera handling prevent blur. Parallax correction may be needed in certain models for accurate framing.
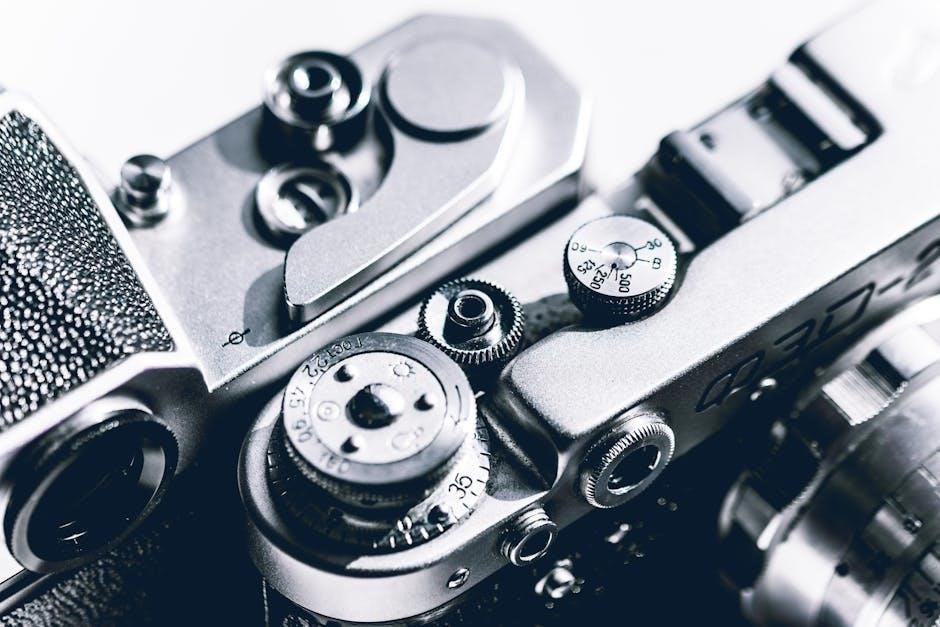
2.3 Shutter and Speed Settings
The shutter controls exposure duration, with speeds ranging from seconds to 1/1000th of a second. Faster speeds freeze motion, while slower speeds create blur. Adjust settings based on lighting and desired effects. Sync with flash for proper illumination. Use B mode for manual timing or T mode for extended exposures. Always test settings to ensure optimal results for your film type and scene conditions.
2.4 Film Advance and Rewind Mechanisms
The film advance lever moves the film to the next frame after each exposure. Turning it ensures proper spacing and alignment. For rewinding, locate the rewind knob or button, typically on the top or bottom. Turn it clockwise until the film is fully rewound into its cartridge. Proper handling prevents exposure and damage, ensuring your film remains intact for processing.
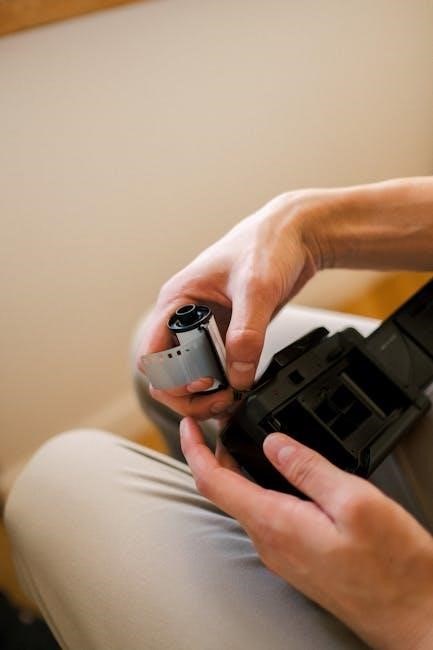
Loading Film in Your Camera
Insert the film cartridge into the film chamber, ensuring it clicks securely. Close the camera back tightly and advance the film using the lever to prepare for shooting.
3.1 Loading 35mm Film
Open the camera back by lifting the rewind knob. Insert the 35mm film cartridge into the film chamber, ensuring it clicks into place. Align the film leader with the red marker on the take-up spool. Close the camera back firmly and advance the film using the lever until it stops. Check the frame counter to confirm it starts at “1.” Set the ISO speed as indicated on the film box.
3.2 Loading 120 Film
For 120 film, open the camera back and locate the film spools. Attach the film to the empty spool, ensuring the paper backing aligns correctly. Close the back gently and wind the film using the advance lever until resistance is felt. Check the film counter and set the ISO accordingly. Some cameras may require trimming 120 film for 620 or 616 models, using adapters if necessary. Always handle film in low-light conditions to prevent exposure.
3.3 Loading 620 and 616 Film
Loading 620 and 616 film requires specific adapters to fit standard 120 film rolls. Trim the 120 film to the required length for 620 cameras or use a spool adapter for 616 models. Insert the trimmed or adapted film into the camera, aligning it with the spool. Close the back, wind the film, and ensure the counter advances correctly. Always refer to the manual for precise adapter specifications and handling tips to avoid film damage.
3.4 Film Advance Lever and Initial Setup
The film advance lever is essential for loading and preparing the camera. After inserting the film, close the camera back and push the lever into its locked position. Ensure the film is properly aligned and the lever clicks into place. Wind the film gently until it stops, confirming the first frame is set. The lever should remain in position when not in use to avoid accidental exposures.
Basic Shooting Techniques
Mastering basic shooting techniques ensures sharp, well-exposed images. Start with proper camera handling, composing shots through the viewfinder, and adjusting settings for optimal results every time.
4.1 Composing Your Shot
Composing your shot is crucial for capturing visually appealing images. Use the viewfinder to frame your subject, employing techniques like the rule of thirds and leading lines. Focus on your subject to ensure sharpness, while the background softly blurs. Step back, observe, and adjust your framing to create balanced, engaging compositions that tell a story. Practice makes perfect in refining your composition skills.
4.2 Focusing and Metering
Focus your subject using the lens ring for sharpness. Look through the viewfinder, aligning the subject with the center for accurate metering. Adjust aperture and shutter speed based on light readings to ensure proper exposure. Hold the camera steady to avoid blur. Use the film speed setting to optimize results in various lighting conditions.
4.3 Setting Exposure and Aperture
Set the aperture by adjusting the lens ring, choosing lower f-stops for more light or higher for less. Use the shutter speed dial to balance exposure, ensuring proper light meter readings. Adjust the film speed (ASA/ISO) based on lighting conditions. Bracket shots for consistency, especially in challenging light. Proper exposure setup ensures sharp, well-lit images with optimal detail in both highlights and shadows.
4.4 Holding the Camera Steady
Hold the camera firmly with both hands, placing your right thumb behind the film advance lever and forefinger on the shutter. Keep your elbows close to your body for stability. For added steadiness, use a tripod or brace against a solid object. A steady hold minimizes camera shake, reducing blur and ensuring sharp images, especially in low-light conditions or with slower shutter speeds.
Advanced Exposure Control
Master advanced techniques like aperture-priority, shutter-priority, and manual modes. Adjust exposure compensation and use metering tools to achieve precise control over lighting and image results.
5.1 Aperture-Priority Mode
In aperture-priority mode, you set the desired aperture, and the camera automatically adjusts the shutter speed for proper exposure. This mode is ideal for controlling depth of field, allowing creative decisions on blur and sharpness. Use it for portraits, landscapes, or when precise aperture control is crucial. Ensure the camera’s light meter is accurate for optimal results.
5.2 Shutter-Priority Mode
In shutter-priority mode, you select the shutter speed, and the camera automatically adjusts the aperture for proper exposure. This mode is perfect for capturing motion, such as freezing action or creating blur. Faster speeds stop motion, while slower speeds create artistic blur. Ensure the film speed (ASA/ISO) is set correctly for optimal results in various lighting conditions.
5.3 Manual Mode and Metering
Manual mode offers full control over aperture and shutter speed, allowing precise adjustments for desired effects. Use the camera’s built-in light meter to measure exposure, then set aperture and shutter speed accordingly. This mode is ideal for creative control, enabling techniques like depth of field manipulation or motion capture. Always consider film speed (ASA/ISO) and lighting conditions to achieve optimal results.
5.4 Exposure Compensation
Exposure compensation allows adjustments to lighten or darken images beyond automatic settings, ensuring proper exposure in challenging lighting. Use the exposure compensation dial to adjust in increments, typically in thirds of a stop. This feature is particularly useful in backlit or high-contrast scenes where automatic metering may not capture the desired effect. Adjustments can be made in aperture-priority or program modes for precise control over the final image.
Film Speed and ISO Settings
Film speed, measured in ASA/ISO, determines sensitivity to light. Lower ISOs (50-100) suit bright conditions, while higher ISOs (400-1600) are ideal for low light, minimizing grain and ensuring proper exposure.
6.1 Understanding Film Speed (ASA/ISO)
Film speed, measured in ASA or ISO, indicates sensitivity to light. Lower values (50-100) are for bright conditions, while higher values (400-1600) suit low light. Understanding film speed is crucial for achieving optimal exposure, balancing grain, and capturing sharp images. Proper ISO settings enhance image quality, ensuring clarity and detail in various lighting environments, making it a fundamental aspect of film photography.
6.2 Setting the Correct Film Speed
Set the correct film speed (ASA/ISO) on your camera to match the film type. Refer to the film box or manual for the specific ISO value. Adjust the ISO dial on your camera to align with the film’s sensitivity. Properly setting the ISO ensures accurate exposure, avoiding overexposure in bright light or underexposure in low-light conditions, optimizing image quality for your shots.
6.3 Adjusting for Different Lighting Conditions
Adjusting for lighting conditions involves setting the correct exposure. Use the light meter to gauge brightness and set aperture/shutter speed accordingly. Bracket shots for varying exposures. In low light, use slower shutter speeds or wider apertures. In bright conditions, use faster speeds or smaller apertures. Adjust film speed (ASA/ISO) if needed. Proper adjustments ensure well-balanced exposures, capturing detail in both shadows and highlights effectively.
Maintenance and Care of Your Film Camera
Regularly clean the lens and viewfinder with a soft cloth. Lubricate moving parts to ensure smooth operation. Store the camera in a dry, cool place to prevent damage.
7.1 Cleaning the Lens and Viewfinder
Regularly clean the lens and viewfinder using a soft, dry cloth to prevent dust and smudges. Avoid harsh chemicals or abrasive materials that could scratch surfaces. For stubborn marks, dampen the cloth slightly with distilled water, but ensure no moisture enters the camera. Clean the viewfinder gently to maintain clarity. Proper cleaning ensures sharp images and optimal camera performance over time.
7.2 Lubricating Moving Parts
Lubricate moving parts like gears and hinges with a light, synthetic oil to ensure smooth operation. Avoid over-lubrication, as excess oil can attract dust or damage internal mechanisms. Use a clean, lint-free cloth to wipe off any excess. Always refer to your camera manual for specific lubrication recommendations. Proper lubrication extends the camera’s lifespan and maintains its functionality for years of reliable use.
7.3 Proper Storage and Handling
Store your film camera in a cool, dry place away from direct sunlight and chemicals. Use silica gel packets to maintain humidity control and prevent moisture damage. Keep the camera in a protective case or bag to avoid scratches. Always handle lenses with care, avoiding touching the glass surfaces. Proper storage ensures your camera remains functional and ready for use, preserving its longevity and performance over time.
Troubleshooting Common Issues
Troubleshooting common issues with film cameras often involves addressing problems like film not advancing, blurred images, or blank exposures. Check settings, mechanisms, and seek expert advice if issues persist.
8.1 Film Loading Issues
Film loading issues often arise from misaligned film or improper spooling. Ensure the film is correctly seated and threaded through the camera’s Transport bars. For 35mm, 120, 620, or 616 film, verify compatibility and use adapters if needed. Consult the manual or resources like the M. Butkus library for specific instructions to resolve loading problems effectively.
8.2 Blank or Unexposed Film
Blank or unexposed film often results from improper loading, failure to advance the film, or the shutter not firing. Check if the film advance lever is stuck or if the shutter is malfunctioning. Ensure the film speed is correctly set and the camera is properly assembled. If issues persist, consult resources like the M. Butkus library or repair guides for troubleshooting solutions specific to your camera model.
8.3 Blurred or Underexposed Images
Blurred or underexposed images can occur due to improper focusing, insufficient light, or incorrect exposure settings. Ensure the lens is clean and focus is accurate. Check if the aperture and shutter speed match the lighting conditions. Verify film speed settings and ensure the camera is held steady. Refer to your camera’s manual or repair guides for troubleshooting specific models, as outlined in resources like the M. Butkus library.
8.4 Shutter and Aperture Malfunctions
Shutter and aperture malfunctions can disrupt proper exposure. Common issues include stuck aperture blades or inaccurate shutter speeds. Check for dirt or mechanical wear. Ensure the film advance lever is fully wound and the aperture is set correctly. Cleaning or lubricating moving parts may resolve issues.Consult repair manuals or specialists for complex problems, as detailed in resources like the M. Butkus library or Pentax repair guides.
Resources for Further Learning
Explore websites like M. Butkus library for free film camera manuals, or visit Pentax User for downloadable PDF guides. Online forums and repair specialists offer additional support.
9.1 Online Communities and Forums
Online communities like Pentax User and specialized forums offer wealth of resources, including downloadable manuals, troubleshooting tips, and expert advice. These platforms connect enthusiasts, fostering knowledge sharing and support. They provide access to rare manuals, repair guides, and user experiences, making them invaluable for film camera enthusiasts seeking to enhance their skills and resolve technical issues.
9.2 Repair Services and Specialists
Repair services and specialists play a crucial role in maintaining film cameras. They offer expert solutions for mechanical and optical issues, ensuring proper functionality. From lens cleaning to shutter adjustments, professionals provide tailored services. These specialists are essential for preserving the longevity and performance of film cameras, making them indispensable for enthusiasts and photographers seeking reliable results.
9.3 Additional Reading and Tutorials
For deeper understanding, explore additional reading and tutorials available online. Mike’s archive and Pentax User offer detailed guides, while the M. Butkus library provides free manuals. These resources include troubleshooting tips, maintenance advice, and step-by-step tutorials, helping photographers master film camera techniques and solve common issues effectively.
Film camera manuals are invaluable resources for mastering analog photography. From basics to advanced techniques, these guides empower photographers to optimize their craft. With detailed instructions and troubleshooting tips, they ensure optimal camera performance. Whether you’re a novice or an enthusiast, film camera manuals, alongside online tutorials and communities, foster continued learning and a deeper appreciation for the art of film photography.