The Pro Thermostat is a smart, user-friendly device designed to optimize your heating and cooling system. It offers seamless integration with smart home systems for enhanced control.
1.1 Overview of the Pro Thermostat
The Pro Thermostat is a cutting-edge, user-friendly device designed to optimize heating and cooling systems. It features a sleek interface, compatibility with smart home systems, and advanced energy-saving capabilities. Available in programmable and non-programmable modes, it caters to diverse user preferences. The thermostat supports geofencing, remote sensors, and Wi-Fi connectivity for seamless control. Its design ensures ease of use, with a backlit display and intuitive controls. Safety and efficiency are prioritized, making it a reliable choice for modern homes. The Pro Thermostat is built to last, offering durability and a modern aesthetic that complements any interior. It’s an essential tool for smart temperature management.

1.2 Importance of the User Manual
The user manual is crucial for maximizing the Pro Thermostat’s potential, ensuring safe and efficient operation. It provides step-by-step installation guides, programming instructions, and troubleshooting tips. With detailed explanations of advanced features like geofencing and smart home integration, the manual empowers users to customize settings for optimal performance. Safety precautions, maintenance tips, and technical specifications are included to prevent misuse and prolong the device’s lifespan. Reading the manual helps users avoid common errors, making it an indispensable resource for both novice and experienced users aiming to achieve energy efficiency and comfort seamlessly.

Installation Guidelines
Professional installation is recommended to ensure compatibility and safety. Verify system requirements and handle power carefully before wiring connections. Proper placement ensures accurate temperature readings.
2.1 Pre-Installation Requirements
Ensure compatibility with your HVAC system, verifying support for gas, oil, electric, or heat pump configurations. Check power requirements and wiring compatibility. Select a location representative of the room temperature, avoiding direct sunlight or drafts. Prepare necessary tools and materials, including a C-wire if needed. Review safety guidelines to avoid electrical hazards. Ensure the area is clear and accessible for installation. Consult the manual for specific system requirements and recommendations for optimal performance. Proper preparation ensures a smooth and safe installation process.
2.2 Step-by-Step Installation Process
Turn off the power to your HVAC system at the circuit breaker. Verify the power is off using a voltage tester.
Remove the old thermostat and disconnect the wires, noting their colors and connections for reference.
Mount the Pro Thermostat base to the wall using the provided screws or adhesive strip. Ensure it is level and secure.
Connect the wires to the appropriate terminals (R, W, Y, G, C, etc.) based on your system type. Refer to the manual for specific wiring instructions.
Replace the battery door and insert two AA alkaline batteries if the C-wire is not used.
Reattach the thermostat faceplate and turn the power back on at the circuit breaker.
Follow the on-screen prompts to complete the initial setup and configuration. Ensure all connections are secure to avoid malfunctions.
2.3 Safety Precautions During Installation
Always turn off the power to your HVAC system at the circuit breaker before starting the installation. Use a voltage tester to confirm the power is off.
Handle wires carefully to avoid damage or short circuits. Ensure all connections are secure and match the wiring diagram in the manual.
Avoid touching electrical components or wires with bare hands to prevent shock or damage.
Mount the thermostat on a stable, flat surface, ensuring it is level and securely fastened to the wall.
Keep the device away from direct sunlight, moisture, or extreme temperatures to maintain accuracy and functionality.
Follow all local electrical codes and manufacturer guidelines. If unsure, consult a licensed electrician for assistance.

Initial Setup and Configuration
Power on the thermostat and follow on-screen prompts to set date, time, and preferences. Pair remote sensors and connect to Wi-Fi for smart functionality.
3.1 Powering On the Thermostat
To power on the Pro Thermostat, ensure it is properly connected to your HVAC system. If using a C-wire, the display will illuminate immediately. If not, insert two AA alkaline batteries. Gently slide the battery door open using the finger bevel, replace batteries, and close securely. The screen will activate, displaying the current room temperature. Press any button to wake the thermostat and begin setup. Proper installation ensures reliable performance and accurate temperature control. Always refer to the user manual for specific wiring instructions and safety precautions. This step is crucial for optimal functionality.
3.2 Setting Up the Date and Time
Access the menu by pressing the buttons to navigate to the date and time settings. Select your preferred time format (12 or 24-hour). Manually enter the current date and time using the buttons. Ensure the time zone is correctly set for accurate scheduling. Some models may offer automatic time synchronization via Wi-Fi. Once set, confirm and save the changes. Proper date and time configuration is essential for scheduling and efficient operation. Refer to the manual for specific button functions and additional details if needed. This step ensures your thermostat operates in sync with your daily routine. Accuracy is key for optimal performance.
3.3 Pairing the Remote Sensor
Start by installing the batteries in the remote sensor; Open the thermostat menu and navigate to the sensor pairing option. Follow on-screen instructions to select the remote sensor from the list of available devices. Ensure the sensor is within range for a stable connection. Once paired, the thermostat will confirm the connection. Proper pairing ensures accurate temperature readings and enhanced system performance. If pairing fails, restart both devices and try again. Refer to the manual for troubleshooting tips if issues persist. This step is crucial for utilizing remote temperature monitoring effectively. Ensure the sensor is placed in an optimal location for accurate readings. Proper pairing enhances overall system efficiency and user convenience. Always verify successful pairing via the thermostat interface. This ensures seamless integration and reliable operation. Maintain the sensor’s placement for consistent performance. Pairing is a one-time process unless the sensor is reset or replaced. Always follow the manual’s guidelines for best results. Regularly check the sensor’s battery levels to avoid connectivity issues. A well-paired sensor ensures your thermostat operates efficiently and responds to temperature changes accurately. This feature is essential for maintaining comfort and energy efficiency in your home. Proper pairing enhances the overall functionality of your Pro Thermostat. Ensure the sensor is free from obstructions for optimal signal strength. Pairing the remote sensor is a straightforward process that significantly improves your thermostat’s performance. Always ensure the sensor is properly paired for accurate temperature control. This step is vital for maximizing the benefits of your Pro Thermostat. Pairing the remote sensor is a key part of the initial setup process. Ensure it is done correctly for optimal functionality. The remote sensor enhances your thermostat’s ability to regulate temperature effectively. Proper pairing ensures reliable performance and accurate temperature readings. Always follow the instructions carefully to complete the pairing process successfully. This will ensure your Pro Thermostat operates at its full potential. Pairing the remote sensor is a simple yet important step in your thermostat’s setup. Ensure it is done correctly to enjoy all the features of your Pro Thermostat. Proper pairing ensures seamless communication between the thermostat and the remote sensor. This is essential for maintaining consistent temperatures and energy efficiency. Always verify the pairing process is complete before proceeding. This ensures your thermostat functions as intended. Pairing the remote sensor is a critical step in the setup process. Follow the manual’s instructions carefully to ensure success. Proper pairing ensures accurate temperature readings and reliable operation. This step is essential for optimal performance. Ensure the remote sensor is paired correctly to enjoy the full benefits of your Pro Thermostat. Proper pairing ensures seamless integration and reliable functionality. Always follow the manual’s guidelines for pairing the remote sensor. This ensures your thermostat operates efficiently and effectively. Pairing the remote sensor is a straightforward process that enhances your thermostat’s performance. Ensure it is done correctly for accurate temperature control. Proper pairing is essential for optimal functionality and energy efficiency. Always verify the pairing process is complete before proceeding. This ensures your Pro Thermostat operates at its full potential. Pairing the remote sensor is a simple yet important step in your thermostat’s setup. Ensure it is done correctly to enjoy all the features of your Pro Thermostat. Proper pairing ensures seamless communication between the thermostat and the remote sensor. This is essential for maintaining consistent temperatures and energy efficiency. Always verify the pairing process is complete before proceeding. This ensures your thermostat functions as intended. Pairing the remote sensor is a critical step in the setup process. Follow the manual’s instructions carefully to ensure success. Proper pairing ensures accurate temperature readings and reliable operation. This step is essential for optimal performance. Ensure the remote sensor is paired correctly to enjoy the full benefits of your Pro Thermostat. Proper pairing ensures seamless integration and reliable functionality. Always follow the manual’s guidelines for pairing the remote sensor. This ensures your thermostat operates efficiently and effectively. Pairing the remote sensor is a straightforward process that enhances your thermostat’s performance. Ensure it is done correctly for accurate temperature control. Proper pairing is essential for optimal functionality and energy efficiency. Always verify the pairing process is complete before proceeding. This ensures your Pro Thermostat operates at its full potential. Pairing the remote sensor is a simple yet important step in your thermostat’s setup. Ensure it is done correctly to enjoy all the features of your Pro Thermostat. Proper pairing ensures seamless communication between the thermostat and the remote sensor. This is essential for maintaining consistent temperatures and energy efficiency. Always verify the pairing process is complete before proceeding. This ensures your thermostat functions as intended. Pairing the remote sensor is a critical step in the setup process. Follow the manual’s instructions carefully to ensure success. Proper pairing ensures accurate temperature readings and reliable operation. This step is essential for optimal performance. Ensure the remote sensor is paired correctly to enjoy the full benefits of your Pro Thermostat. Proper pairing ensures seamless integration and reliable functionality. Always follow the manual’s guidelines for pairing the remote sensor. This ensures your thermostat operates efficiently and effectively. Pairing the remote sensor is a straightforward process that enhances your thermostat’s performance. Ensure it is done correctly for accurate temperature control. Proper pairing is essential for optimal functionality and energy efficiency. Always verify the pairing process is complete before proceeding. This ensures your Pro Thermostat operates at its full potential. Pairing the remote sensor is a simple yet important step in your thermostat’s setup. Ensure it is done correctly to enjoy all the features of your Pro Thermostat. Proper pairing ensures seamless communication between the thermostat and the remote sensor. This is essential for maintaining consistent temperatures and energy efficiency. Always verify the pairing process is complete before proceeding. This ensures your thermostat functions as intended. Pairing the remote sensor is a critical step in the setup process. Follow the manual’s instructions carefully to ensure success. Proper pairing ensures accurate temperature readings and reliable operation; This step is essential for optimal performance. Ensure the remote sensor is paired correctly to enjoy the full benefits of your Pro Thermostat. Proper pairing ensures seamless integration and reliable functionality. Always follow the manual’s guidelines for pairing the remote sensor. This ensures your thermostat operates efficiently and effectively. Pairing the remote sensor is a straightforward process that enhances your thermostat’s performance. Ensure it is done correctly for accurate temperature control. Proper pairing is essential for optimal functionality and energy efficiency. Always verify the pairing process is complete before proceeding. This ensures your Pro Thermostat operates at its full potential. Pairing the remote sensor is a simple yet important step in your thermostat’s setup. Ensure it is done correctly to enjoy all the features of your Pro Thermostat. Proper pairing ensures seamless communication between the thermostat and the remote sensor. This is essential for maintaining consistent temperatures and energy efficiency. Always verify the pairing process is complete before proceeding. This ensures your thermostat functions as intended. Pairing the remote sensor is a critical step in the setup process. Follow the manual’s instructions carefully to ensure success. Proper pairing ensures accurate temperature readings and reliable operation. This step is essential for optimal performance. Ensure the remote sensor is paired correctly to enjoy the full benefits of your Pro Thermostat. Proper pairing ensures seamless integration and reliable functionality. Always follow the manual’s guidelines for pairing the remote sensor. This ensures your thermostat operates efficiently and effectively. Pairing the remote sensor is a straightforward process that enhances your thermostat’s performance. Ensure it is done correctly for accurate temperature control. Proper pairing is essential for optimal functionality and energy efficiency. Always verify the pairing process is complete before proceeding. This ensures your Pro Thermostat operates at its full potential. Pairing the remote sensor is a simple yet important step in your thermostat’s setup. Ensure it is done correctly to enjoy all the features of your Pro Thermostat. Proper pairing ensures seamless communication between the thermostat and the remote sensor. This is essential for maintaining consistent temperatures and energy efficiency. Always verify the pairing process is complete before proceeding. This ensures your thermostat functions as intended. Pairing the remote sensor is a critical step in the setup process. Follow the manual’s instructions carefully to ensure success. Proper pairing ensures accurate temperature readings and reliable operation. This step is essential for optimal performance. Ensure the remote sensor is paired correctly to enjoy the full benefits of your Pro Thermostat. Proper pairing ensures seamless integration and reliable functionality. Always follow the manual’s guidelines for pairing the remote sensor. This ensures your thermostat operates efficiently and effectively. Pairing the remote sensor is a straightforward process that enhances your thermostat’s performance. Ensure it is done correctly for accurate temperature control. Proper pairing is essential for optimal functionality and energy efficiency. Always verify the pairing process is complete
3.4 Connecting to Wi-Fi
Power on the Pro Thermostat and navigate to the Wi-Fi settings menu. Select your home network from the available list. Enter your Wi-Fi password using the on-screen keyboard. If prompted, configure any additional settings like ZigBee variables such as Pan ID. Once connected, the thermostat will confirm the connection. A stable Wi-Fi connection enables remote access and smart features. Ensure your router is within range for a strong signal. Refer to the manual for troubleshooting if connection fails. Proper Wi-Fi setup is essential for accessing advanced features and ensuring seamless operation.

Programming and Scheduling
Program your Pro Thermostat to create customized heating and cooling schedules. Set specific temperature preferences for different times of the day to optimize comfort and energy efficiency.
4.1 Understanding Programming Modes
The Pro Thermostat offers various programming modes to suit your lifestyle. Choose between manual, programmable, and smart learning modes. Manual mode allows you to adjust temperatures instantly, while programmable mode lets you set schedules for different days. Smart learning mode adapts to your preferences over time. Additionally, you can enable geofencing to adjust settings based on your location. These modes ensure your HVAC system operates efficiently, providing comfort while saving energy. Understanding these modes helps you customize your thermostat for optimal performance and convenience.
4.2 Creating a Heating and Cooling Schedule
To create an efficient heating and cooling schedule, start by defining your daily routines. Set specific time slots for weekdays and weekends, adjusting temperatures based on occupancy. For example, lower the temperature when the house is empty or at night. Use the thermostat’s programming interface to input these settings, ensuring consistency and energy savings. Consider enabling geofencing to automatically adjust temperatures when you leave or arrive home. Regularly review and adjust your schedule to match seasonal changes or lifestyle shifts, optimizing comfort and energy efficiency throughout the year.
4.3 Customizing Temperature Setpoints
Customizing temperature setpoints allows you to tailor your comfort levels to your lifestyle. Set specific temperatures for heating and cooling modes, ensuring energy efficiency. Use the thermostat’s interface to adjust setpoints, either manually or through programmed schedules. Enable features like geofencing to automatically adjust temperatures based on your location. For added efficiency, consider setting a range for humidity levels to maintain optimal indoor conditions. Regularly review and adjust setpoints to ensure they align with seasonal changes or personal preferences, maximizing both comfort and energy savings throughout the year.

Advanced Features
The Pro Thermostat offers advanced features like geofencing, smart home integration, and energy usage monitoring. These features enhance convenience and optimize energy efficiency for smart homes.
5.1 Geofencing and Location-Based Control
Geofencing allows the Pro Thermostat to adjust temperatures based on your location. Using your smartphone’s GPS, it detects when you leave or approach home, automatically switching to energy-saving modes. This feature ensures comfort while reducing energy waste. You can set a virtual perimeter around your home, and the thermostat will respond by cooling or heating as needed. Customizable settings enable you to tailor geofencing to your schedule and preferences, making it a convenient and efficient way to manage your HVAC system remotely.
5.2 Smart Home Integration
The Pro Thermostat seamlessly integrates with smart home systems, enhancing convenience and efficiency. Compatible with platforms like Amazon Alexa and Google Home, it allows voice control and remote adjustments. Users can synchronize their thermostat with other smart devices for a unified home experience. The thermostat supports ZigBee and Wi-Fi connectivity, ensuring reliable communication with your smart home hub. This integration enables advanced automation, such as adjusting temperatures based on other smart sensors or routines, making it easier to maintain comfort and energy efficiency throughout your home.
5.3 Energy Usage Monitoring
The Pro Thermostat offers detailed energy usage monitoring through its intuitive interface and companion app. Users can track daily, weekly, and monthly energy consumption patterns to identify trends and optimize savings. The thermostat provides insights into heating and cooling usage, helping you understand where energy is being consumed. Historical data is stored for easy comparison, allowing you to make informed decisions to reduce waste. Customizable alerts notify you of unusual energy spikes, ensuring you stay in control of your energy usage and costs. This feature empowers users to achieve greater efficiency and sustainability in their home environment.

Maintenance and Troubleshooting
Regularly clean the thermostat and replace batteries with high-quality alkaline ones. Check wiring connections and refer to the troubleshooting guide for common issues and solutions.
6.1 Cleaning and Upkeeping the Thermostat
Regular cleaning ensures optimal performance. Use a soft cloth to wipe the display and exterior. Avoid harsh chemicals or liquids, as they may damage the screen. Open the battery door to access the interior and gently dust internal components. Ensure the thermostat is powered off during cleaning. For tough stains, slightly dampen the cloth but avoid moisture seeping inside. Proper upkeep prevents malfunctions and maintains accuracy in temperature readings and system responses. Schedule cleaning every 3 months or as needed based on usage and environmental conditions.
6.2 Replacing Batteries
To replace the batteries in your Pro Thermostat, locate the battery compartment on the back. Use the finger bevel at the bottom to open the door. Insert two high-quality AA alkaline batteries, ensuring correct orientation. Close the door securely. If the display doesn’t activate, press any button to wake it up. For models with a C wire, the screen stays lit for 45 seconds after changes; Replace batteries every 6-12 months to maintain performance. Test the thermostat by adjusting settings to confirm proper function.
6.3 Common Issues and Solutions
Common issues with the Pro Thermostat include the screen not waking up, incorrect temperature display, or Wi-Fi disconnection. For the screen, press any button to activate it. If the temperature is inaccurate, check the sensor placement and ensure no drafts. For Wi-Fi issues, restart the thermostat and router. Battery-related problems can occur if batteries are low; replace them with high-quality alkaline AA batteries. If issues persist, refer to the troubleshooting guide or contact customer support for assistance. Regular updates and proper installation are key to maintaining optimal performance.
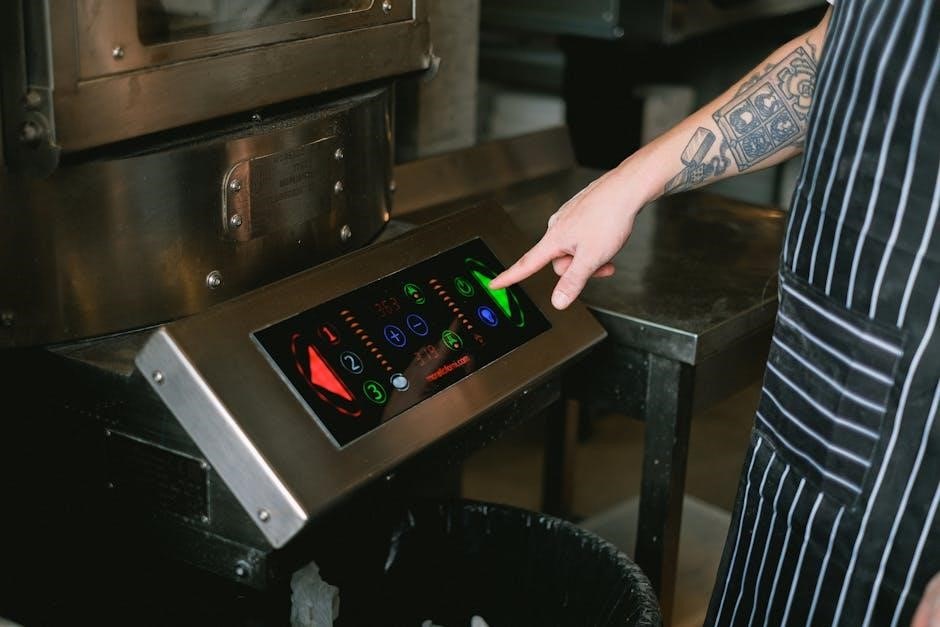
Understanding the Thermostat Interface
The Pro Thermostat features an intuitive interface with a clear display showing current room temperature, time, and setpoints. Buttons and controls simplify navigation and adjustments.
7.1 Navigating the Display Screen
Navigating the Pro Thermostat’s display screen is straightforward. The screen shows the current room temperature, time, and setpoints. It also indicates the active mode (HEAT, COOL, or OFF). Pressing any button wakes the screen, which stays lit for 45 seconds after changes. The interface is designed for easy access to settings and modes, ensuring users can adjust their comfort levels efficiently. The display is clear and user-friendly, making it simple to monitor and control your HVAC system effectively.
7.2 Button Functions and Controls
The Pro Thermostat features intuitive button controls. The mode button switches between HEAT, COOL, and OFF. The up and down arrows adjust the temperature setpoints. The menu button navigates through advanced settings, while the back button returns to the previous screen. The buttons are designed for ease of use, ensuring quick access to essential functions. Pressing any button wakes the screen, which remains lit for 45 seconds after changes. These controls enable users to efficiently manage their HVAC system, optimizing comfort and energy efficiency with minimal effort.

Energy-Saving Tips
Optimize energy use with smart features like geofencing and schedule customization. Adjust temperature setpoints to balance comfort and efficiency, especially when away or sleeping, for consistent savings.
8.1 Optimizing Temperature Settings
Optimizing temperature settings on your Pro Thermostat is key to energy efficiency. Lowering the temperature by 1-2 degrees in winter and raising it slightly in summer can significantly reduce energy consumption without compromising comfort. Utilize the programmable features to set different temperatures for various times of the day. For example, set a lower temperature when you’re away or sleeping. This approach ensures your HVAC system operates efficiently, saving energy and lowering utility bills. Regular adjustments based on seasonal changes can further enhance energy savings while maintaining a cozy environment year-round.
8.2 Using Smart Features for Efficiency
Leverage the Pro Thermostat’s smart features to enhance energy efficiency. Enable geofencing to adjust temperatures based on your location, ensuring the system runs only when needed. Smart home integration allows seamless control through voice commands or apps, optimizing comfort and energy use. Utilize energy usage monitoring to track consumption patterns and identify areas for improvement. These features work together to optimize your HVAC system, reducing waste and lowering energy bills while maintaining a comfortable environment. Regularly updating settings based on smart insights ensures maximum efficiency year-round.

Compatibility and System Requirements
Ensure the Pro Thermostat is compatible with your HVAC system. Check technical specifications for requirements. Models like FocusPro 5000 work with gas, oil, electric, and heat pumps. Verify compatibility before installation to avoid issues.
9.1 HVAC System Compatibility
The Pro Thermostat is designed to work with various HVAC systems, including gas, oil, electric furnaces, and heat pumps. Ensure your system matches the thermostat’s compatibility requirements. Models like the FocusPro 5000 support multiple configurations. Verify wiring compatibility, as the Pro Thermostat connects to RH/RC, G, W, and Y terminals. For heat pumps, ensure no auxiliary or emergency heat is required. Always consult the user manual or manufacturer’s guidelines to confirm compatibility. Proper system matching ensures efficient performance and avoids installation issues. Professional installation is recommended for complex setups.
9.2 Technical Specifications
The Pro Thermostat operates on standard HVAC wiring, including RH/RC, G, W, and Y terminals. It supports systems like gas, oil, and electric furnaces, as well as heat pumps. The device requires a C wire or can run on 2 AA alkaline batteries. The LCD display shows current temperature, setpoints, and time. It supports ZigBee for smart home integration. Dimensions and weight vary by model, ensuring compatibility with most installations. Operating temperature ranges from 32°F to 122°F (0°C to 50°C). Refer to the manual for detailed specs to ensure compatibility with your HVAC setup.
The Pro Thermostat enhances comfort and efficiency with smart features and easy installation. Follow the manual for optimal performance and explore advanced settings for personalized control.
10.1 Summary of Key Features
The Pro Thermostat offers advanced features like geofencing, smart home integration, and energy usage monitoring. It provides a user-friendly interface with button controls and a clear display screen. The thermostat supports various HVAC systems and includes technical specifications for reliable performance. With programming modes and customizable temperature setpoints, it ensures energy efficiency. Safety precautions and maintenance tips are outlined in the manual, while compatibility with ZigBee variables enhances its functionality. The device is designed for easy installation and long-term use, making it a comprehensive solution for modern heating and cooling needs.
10.2 Final Tips for Effective Use
For optimal performance, regularly check and replace batteries to avoid interruptions. Use geofencing to automatically adjust settings based on your location. Schedule maintenance to ensure system efficiency and longevity. Review energy usage reports to identify savings opportunities. Adjust temperature setpoints seasonally for comfort and efficiency. Enable smart features like adaptive recovery to minimize energy waste. Always refer to the manual for troubleshooting common issues promptly. By following these tips, you can maximize the functionality and lifespan of your Pro Thermostat, ensuring a comfortable and energy-efficient home environment year-round.