
The Honeywell T4 Pro Thermostat is a programmable device designed for residential use, offering a user-friendly interface and efficient heating and cooling management. Part of the Resideo T Series, it features seven-day scheduling, adaptive intelligent recovery, and compatibility with various HVAC systems, ensuring comfort and energy efficiency.
1.1 Overview of the Honeywell T4 Pro Series
The Honeywell T4 Pro Series is a line of programmable thermostats designed to provide intuitive control over home heating and cooling systems. Manufactured by Resideo Technologies, these thermostats are part of the Honeywell Home T Series, emphasizing simplicity and efficiency. The T4 Pro models, such as the TH4110U2005 and TH4210U2002, are known for their sleek design and user-friendly interface, making them accessible to homeowners of all technical skill levels. They support advanced features like adaptive intelligent recovery, which learns the system’s performance to optimize temperature control, and geofencing for location-based adjustments. The series is compatible with various HVAC systems, including conventional, heat pump, and hydronic configurations. With a focus on energy efficiency and comfort, the T4 Pro Series offers seven-day programmable scheduling, allowing users to customize their settings for weekdays and weekends. Its universal mounting system and on-screen installation guide simplify setup, ensuring a seamless experience for both installers and users.
1.2 Key Features of the T4 Pro Thermostat
The Honeywell T4 Pro Thermostat boasts a range of key features that enhance user experience and energy efficiency. Its programmable interface allows for seven-day scheduling, enabling users to set different temperature profiles for weekdays and weekends. The thermostat also features adaptive intelligent recovery, which learns the system’s heating and cooling patterns to ensure optimal comfort by the scheduled time. Geofencing capabilities provide location-based control, adjusting temperatures automatically when you leave or arrive home. Voice control integration with smart assistants like Amazon Alexa and Google Assistant adds convenience. The thermostat is compatible with various HVAC systems, including conventional, heat pump, and hydronic configurations, and supports multi-stage heating and cooling. A universal mounting system simplifies installation, while the on-screen menu guides users through setup and programming. The T4 Pro also offers advanced setup options, such as keypad lockout and automatic software updates, ensuring both security and up-to-date functionality.
1.3 Benefits of Using the T4 Pro Programmable Thermostat
Using the Honeywell T4 Pro Programmable Thermostat offers numerous benefits, primarily centered around enhanced comfort, energy efficiency, and convenience. By allowing users to create tailored heating and cooling schedules, the T4 Pro helps reduce energy waste, leading to lower utility bills. Its adaptive intelligent recovery feature ensures the system operates efficiently, learning the time needed to reach desired temperatures and adjusting operations accordingly. The thermostat’s geofencing and voice control capabilities provide seamless integration with smart home systems, offering remote access and hands-free adjustments. Additionally, the T4 Pro’s user-friendly interface and step-by-step on-screen installation guide make it accessible for both DIY enthusiasts and professionals. With features like automatic updates and compatibility with various HVAC systems, the T4 Pro delivers long-term reliability and flexibility, making it a practical and modern solution for home climate control. These features collectively enhance user experience while promoting energy savings and system longevity.
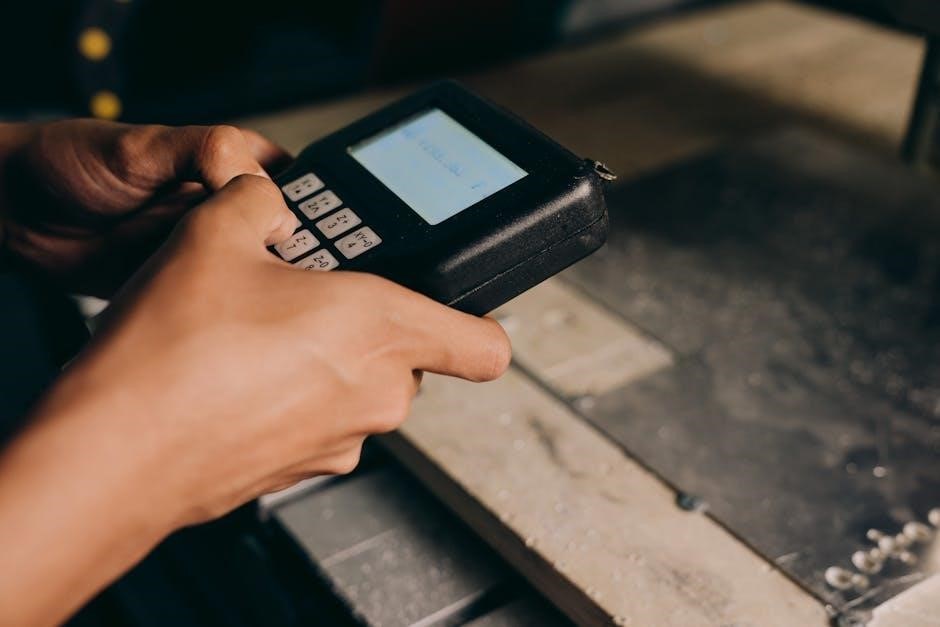
Installation Instructions for the Honeywell T4 Pro
The Honeywell T4 Pro installation involves compatibility checks, wiring connections, and step-by-step on-screen guidance. Ensure proper wiring using provided diagrams and follow the universal mounting system for a seamless setup experience.
2.1 Pre-Installation Requirements and System Compatibility
Before installing the Honeywell T4 Pro Thermostat, ensure compatibility with your HVAC system. It supports conventional 1H/1C systems, heat pumps with 2H/1C, and requires a 24V transformer. Verify wiring terminals (R, C, W, Y, G, etc.) match your system. A common wire (C) is recommended for continuous power. Check the existing thermostat wiring and system type to ensure smooth operation. The T4 Pro is designed for residential use and works with forced air and hydronics systems. Refer to the user manual for specific compatibility details to avoid installation issues. Proper system matching ensures optimal performance and prevents potential damage. Always follow safety guidelines and shut off power before starting installation.
2.2 Step-by-Step Installation Guide
Turn Off Power: Switch off the power to your HVAC system at the circuit breaker or fuse box before starting the installation. Verify the system is off using the thermostat.
Remove Old Thermostat: Carefully disconnect and remove the existing thermostat, taking note of the wiring connections for reference.
Label Wires: Use the provided wire labels from the T4 Pro kit to mark each wire according to its terminal (R, W, Y, G, C, etc.). This ensures accurate connections to the new thermostat.
Mount the New Thermostat: Use the Universal Wall Plate (UWP) mounting system to install the T4 Pro. Align the plate with the wall and secure it with screws. Attach the thermostat to the mounting system.
Connect Wires: Match the labeled wires to the corresponding terminals on the T4 Pro. Refer to the wiring diagram in the user manual for guidance.
Restore Power: Turn the power back on at the circuit breaker and test the system to ensure proper operation.
Follow On-Screen Instructions: The T4 Pro features an on-screen installation guide. Follow the prompts to complete the setup, including selecting your system type and configuring basic settings.
Optional Cover Plate: If needed, install the optional cover plate to conceal any extra holes from the previous thermostat.
This process ensures a smooth and correct installation of your Honeywell T4 Pro Thermostat.
2.3 Wiring Diagrams and Terminal Connections
The Honeywell T4 Pro Thermostat supports various HVAC systems, and proper wiring is essential for its functionality. Refer to the wiring diagrams provided in the user manual to identify the correct terminal connections for your specific system. The thermostat uses standard terminals, including R (power), W (heat), Y (cool), G (fan), C (common), and optional terminals like O/B (heat pump) or AUX (auxiliary heat). For heat-only or cool-only systems, the connections are straightforward, while heat pump systems may require additional wiring for reversing valves. Use the K terminal for heat pumps to control the compressor and fan through a single wire. Ensure all wires are securely connected to the correct terminals, and avoid crossing or damaging wires during installation. If unsure, consult the wiring diagram or contact a licensed HVAC technician for assistance. Proper terminal connections are critical for ensuring the thermostat operates efficiently and safely.

Programming the Honeywell T4 Pro Thermostat
Programming the T4 Pro allows you to set schedules for heating and cooling. Easily adjust the time, create weekly schedules, and customize weekend settings. Advanced options ensure optimal comfort and efficiency year-round.
3.1 Setting the Time and Date
Setting the time and date on the Honeywell T4 Pro Thermostat is a straightforward process. Start by pressing the “Menu” button to access the thermostat’s settings. Use the arrows to navigate to the “Clock” or “Time and Date” option, then press “Select” to enter the submenu. Use the up and down arrows to adjust the hour, minute, and AM/PM settings. Once the correct time is set, scroll to the date option and adjust the day, month, and year using the same arrows. After confirming the settings, press “Done” to save and exit the menu. Ensure the time and date are accurate for proper schedule execution. The thermostat also features a 12/24-hour format option, which can be selected during setup. If your system is connected to a C wire, the screen will stay lit for 45 seconds after changes, allowing you to verify the settings. Accurate time and date settings are essential for optimal performance of programmable features.
3.2 Creating a Weekly Schedule
Creating a weekly schedule on the Honeywell T4 Pro Thermostat allows you to customize your heating and cooling preferences for each day of the week. Start by pressing the “Menu” button and navigating to the “Schedule” option. Use the arrows to select “Create Schedule” and choose the desired day(s) you wish to program. For each day, set the wake, leave, return, and sleep times by adjusting the temperature setpoints using the up and down arrows. You can set different temperatures for each period to optimize comfort and energy savings. The thermostat also offers a “Copy” feature, allowing you to replicate a day’s schedule to other days. Once all settings are configured, press “Done” to save the schedule. The T4 Pro supports both weekday and weekend scheduling, providing flexibility for varying routines. Ensure your schedule aligns with your daily activities to maximize efficiency and comfort throughout the week.
3.3 Setting Up Weekend Schedules
To set up weekend schedules on the Honeywell T4 Pro Thermostat, navigate to the “Menu” and select “Schedule.” Choose “Saturday” and set your preferred temperature periods for morning, day, evening, and night. Repeat the process for “Sunday,” adjusting the times as needed to match your weekend routine. Use the “Copy” feature to apply the same schedule to both days if desired. After configuring, press “Done” to save your settings. Ensure the schedule aligns with your activities to optimize comfort and energy efficiency.
3.4 Advanced Programming Options
The Honeywell T4 Pro Thermostat offers advanced programming options to enhance your comfort and energy efficiency. One key feature is the adaptive intelligent recovery, which learns your system’s performance and pre-emptively adjusts heating or cooling to meet your scheduled temperature. Additionally, the thermostat supports geofencing, allowing it to adjust settings based on your location, ensuring energy savings when you’re away. For voice control, the T4 Pro integrates with smart home systems like Amazon Alexa and Google Assistant, enabling hands-free temperature adjustments. Furthermore, the keypad lockout feature prevents unauthorized changes, maintaining your preferred settings. These advanced options provide a tailored and convenient experience, making the T4 Pro a versatile choice for modern households. By leveraging these features, users can optimize their heating and cooling systems for both comfort and efficiency.
Advanced Features of the Honeywell T4 Pro
The Honeywell T4 Pro offers advanced features like adaptive intelligent recovery, geofencing, and voice control integration for enhanced efficiency and convenience. It also includes a keypad lockout for added security and personalized settings.
4.1 Adaptive Intelligent Recovery
The Honeywell T4 Pro Thermostat features Adaptive Intelligent Recovery, a sophisticated technology that learns and adapts to your home’s heating and cooling system. Over time, it calculates the exact time required for your system to reach the desired temperature, ensuring comfort is achieved precisely when scheduled. This feature eliminates unnecessary energy use by pre-emptively adjusting the system’s operation, making it highly efficient. It works seamlessly with programmed schedules, adjusting the start times based on historical performance. Users benefit from consistent comfort without manual adjustments, while energy consumption is optimized. This intelligent recovery system is particularly useful for maintaining a stable indoor climate during extreme weather conditions. The T4 Pro’s ability to adapt ensures that your home is always at the right temperature when you need it, making it a standout feature for modern smart home systems. This technology is a key reason why the T4 Pro is recognized for its efficiency and user-friendly design.
4.2 Geofencing and Location-Based Control
Geofencing and location-based control on the Honeywell T4 Pro Thermostat allow for enhanced automation by using your smartphone’s location to manage your home’s heating and cooling. This feature ensures that your system adjusts temperatures based on your proximity to home, optimizing energy usage and comfort. When you leave a set geographic radius, the thermostat can automatically switch to an energy-saving mode, and when you return, it resumes your preferred settings. This seamless integration with your daily routine eliminates the need for manual adjustments. The T4 Pro works alongside the Honeywell Home app, enabling location-based control through a user-friendly interface. By leveraging geofencing, you can reduce energy waste and enjoy a comfortable home environment without constant monitoring. This feature is particularly useful for busy households, as it adapts to your schedule and lifestyle, providing unparalleled convenience and efficiency in smart home temperature management.
4.3 Voice Control Integration
Voice control integration with the Honeywell T4 Pro Thermostat offers a convenient way to manage your home’s temperature using smart speakers like Amazon Alexa and Google Assistant. This feature allows you to adjust settings, set schedules, or even request the current temperature without manually interacting with the thermostat. By enabling voice commands, you can seamlessly integrate the T4 Pro into your smart home ecosystem, enhancing your daily routine with hands-free control. The Honeywell Home app facilitates this integration, ensuring compatibility with various voice assistant platforms. Whether you’re adjusting the temperature from the comfort of your couch or checking the status of your HVAC system, voice control provides unparalleled ease of use. This feature is particularly beneficial for individuals seeking a modern, connected home experience, as it simplifies temperature management and adds an extra layer of convenience to your lifestyle.

Troubleshooting the Honeywell T4 Pro Thermostat
Troubleshooting the Honeywell T4 Pro Thermostat involves identifying common issues like display problems or temperature inaccuracies. Solutions include resetting the device, checking wiring connections, and ensuring proper system compatibility. Refer to the user manual for detailed guidance.
5.1 Common Issues and Solutions
Common issues with the Honeywell T4 Pro Thermostat include the device not turning on, inaccurate temperature readings, or unresponsiveness. To resolve these, ensure the thermostat is properly powered and check for loose wiring connections. If the display is blank, verify that the circuit breaker or fuse hasn’t tripped. For temperature discrepancies, recalibrate the thermostat or ensure it’s placed away from direct sunlight or drafts. If the thermostat isn’t responding to inputs, perform a factory reset by pressing and holding the center button for 10 seconds. Connectivity issues with smart features can be addressed by restarting the device or checking your internet connection. If abnormal noises occur, inspect for mechanical faults and contact a professional if needed. Always refer to the user manual for detailed troubleshooting steps.
5.2 Resetting the Thermostat to Factory Settings
To reset the Honeywell T4 Pro Thermostat to factory settings, press and hold the center button for approximately 10 seconds. This action will restore all settings to their default configuration, including temperature, scheduling, and system preferences. During the reset, the screen may momentarily go dark or display a confirmation message. Once completed, the thermostat will reboot and display the initial setup menu. Note that resetting the thermostat will erase all programmed schedules and custom settings, requiring you to reconfigure the device afterward. This process is useful for resolving persistent issues or preparing the thermostat for a new installation. Always refer to the user manual for detailed instructions on performing a factory reset safely and effectively.
5.3 Diagnosing Wiring and Connection Problems
Diagnosing wiring and connection issues with the Honeywell T4 Pro Thermostat involves checking the integrity of the system connections and ensuring all wires are correctly installed. Start by verifying that the thermostat has power; if the screen is blank, check the circuit breaker or fuse box. Inspect the wiring for any signs of damage, such as frayed or loose connections. Consult the wiring diagram provided in the user manual to confirm that each wire is connected to the correct terminal. Common issues include miswired terminals, missing C-wires, or incorrect system type configurations. If the thermostat fails to control the HVAC system, ensure the Y, G, and C wires are properly connected. For heat pump systems, verify the O/B wires are correctly configured. If issues persist, refer to the troubleshooting section of the manual or contact a professional for assistance. Proper wiring is essential for optimal thermostat performance and system operation. Always follow safety guidelines when working with electrical systems.

Maintenance and Care for the T4 Pro Thermostat
Regular maintenance ensures the Honeywell T4 Pro Thermostat operates efficiently. Clean the screen and vents with a soft cloth to prevent dust buildup. Update software periodically for optimal performance and new features. Replace batteries if applicable, and check wiring connections to avoid issues. Schedule annual HVAC system checks to maintain compatibility and ensure accurate temperature control. Proper care extends the thermostat’s lifespan and enhances functionality. Always refer to the user manual for detailed maintenance instructions and troubleshooting tips to keep your thermostat running smoothly.
6.1 Cleaning the Thermostat
Cleaning the Honeywell T4 Pro Thermostat is essential for maintaining its performance and longevity. Use a soft, dry cloth to gently wipe the display screen and vents, ensuring no moisture or harsh chemicals are applied. Avoid pressing too hard, as the touchscreen may be damaged. For tougher dust buildup, lightly dampen the cloth with water, but ensure it is thoroughly dried before wiping the thermostat. Regular cleaning prevents dust from interfering with temperature sensors and maintains accurate readings. Turn off the power to the thermostat before cleaning to avoid any potential electrical issues. Cleaning should be done monthly or as needed, depending on usage and environmental conditions. Always refer to the user manual for specific cleaning instructions tailored to your device. Proper maintenance ensures the thermostat operates efficiently and provides consistent comfort in your home. Regular cleaning is a simple yet effective way to keep your Honeywell T4 Pro functioning at its best.
6;2 Updating Software and Firmware
Updating the software and firmware of your Honeywell T4 Pro Thermostat is crucial for ensuring optimal performance and accessing the latest features. Check for updates periodically by navigating to the settings menu on the thermostat. If an update is available, follow the on-screen instructions to download and install it. Ensure the thermostat is connected to a power source during the update process to prevent interruptions. For manual updates, visit the Honeywell Home website to download the latest firmware version and transfer it to the thermostat using a USB drive or through the mobile app. Always refer to the user manual for detailed step-by-step instructions. Regular software updates enhance functionality, improve compatibility with smart home systems, and resolve any potential bugs. Keeping your Honeywell T4 Pro up to date ensures a seamless and efficient user experience. Updating is a straightforward process that helps maintain the thermostat’s advanced features and operational efficiency.
6.3 Replacing Batteries (if applicable)
The Honeywell T4 Pro Thermostat may require battery replacement depending on the installation type. If your thermostat is battery-powered, ensure you use the correct type of batteries, typically AA or AAA alkaline, as specified in the user manual. To replace the batteries, first, turn off the power to the thermostat at the circuit breaker or switch. Open the battery compartment, usually located on the back or bottom of the device, by sliding it off or using a screwdriver if required. Remove the old batteries and insert the new ones, ensuring the polarity matches the diagram inside the compartment. Replace the battery cover and restore power. If applicable, the display will prompt you to recalibrate settings. Always test the thermostat after replacing batteries to ensure proper function. Refer to the user manual for specific instructions, as some models may not require batteries if they are hardwired. Regular battery replacement helps maintain optimal performance and functionality.
Honeywell T4 Pro User Manual and Support Resources
The Honeywell T4 Pro User Manual provides comprehensive installation, programming, and troubleshooting guidance. Access official PDF manuals, online support, and contact information for Honeywell customer service through their website or authorized distributors.
7.1 Accessing the Official User Manual PDF
To access the official Honeywell T4 Pro User Manual PDF, visit the Honeywell Home website or authorized distributors. The manual is available for download as both optimized and original PDF versions, ensuring compatibility with various devices. It covers detailed installation steps, programming instructions, and troubleshooting tips tailored for the T4 Pro model. Additionally, the manual includes advanced setup options and specifications for models like TH4110U2005 and TH4210U2002. Users can also find wiring diagrams, adaptive intelligent recovery settings, and geofencing configurations. For convenience, the manual is searchable and indexed for quick access to specific topics. If you’re having trouble locating the manual, Honeywell’s customer support can provide direct links or guide you through the download process. Regularly check for updates, as Honeywell periodically releases revised versions with improved features and clarifications.
7.2 Online Support and Troubleshooting Guides
Honeywell offers comprehensive online support and troubleshooting guides for the T4 Pro Thermostat through their official website and authorized portals. These resources include detailed step-by-step instructions, FAQs, and video tutorials to address common issues and advanced configurations. Users can access specific troubleshooting sections for installation, programming, and system operation. Additionally, Honeywell provides interactive tools to diagnose problems, such as error code explanations and wiring diagrams. The support section also offers guides for features like geofencing, voice control integration, and adaptive recovery. For further assistance, Honeywell’s customer support team is available to help resolve technical difficulties. Online forums and community discussions are also accessible, where users can share experiences and solutions. Regularly updated with the latest information, these resources ensure that T4 Pro users can efficiently troubleshoot and optimize their thermostat’s performance without professional intervention.
7.3 Contacting Honeywell Customer Support
For direct assistance with the Honeywell T4 Pro Thermostat, users can contact Honeywell’s customer support team through various channels. The official Honeywell website provides a dedicated support section with contact information, including phone numbers, email options, and live chat. Regional customer service numbers are available for users in different countries, ensuring prompt assistance. Additionally, Honeywell offers a 24/7 support hotline for urgent inquiries. Before reaching out, users are encouraged to have their thermostat model number (e.g., TH4110U2005) and a detailed description of the issue ready. Honeywell also provides multilingual support to cater to a diverse user base. For less urgent matters, users can submit a support request through the online portal, which typically receives a response within 24-48 hours. This comprehensive support system ensures that T4 Pro users receive the help they need to resolve any issues efficiently.